Wednesday, March 7, 2018

Baby Time Class

Hello Everyone!

Since moving to Odessa I have for NOTHING to do with my baby. No classes, No clubs and the only mommy group that I can find is focused on older kids (my 5 month old would not enjoy the activities yet). So I made a proposal and I have received permission and am now starting a  Baby Time Class (ages 18mo and younger) at my church!!!


I am so excited about this because it is giving me the opportunity to research enrichment activities, help parents find things to do with baby, and gives me time to socialize with other mommys. I am trying to host this class once a week (Schedule dependent) and am totally going to post it on here to so that others can view and get inspired for their own classes!

Each weeks lesson will include:
· Opening Prayer
· Sign Language Time - I am learning (self taught) Sign Language and have read about how beneficial it is. Introducing children slowly to this second language to children can help develop verbal and nonverbal language skills.
· Baby and Me workout time - There are several types of workouts that can be done with both parent and child.
· Music Time - Time to introduce a new instrument to the class and then play with “shaker eggs”.
· Developmental Time - This activity will change every week and include activities to develop young children's minds and give parents new skills.
· Story Time -
· Parent  Chat Time - Gives parents a time to chat about things and ask other parents about anything that they would like feedback on (feeding tactics, potty training, teething, etc)
· Closing Prayer

Materials needed -
· Each parent to bring a blanket for their child to lay/sit on


I am just thrilled to share this with you. Let me know if you have any fun ideas for a class

Monday, March 5, 2018

Free Pattern of the Week!

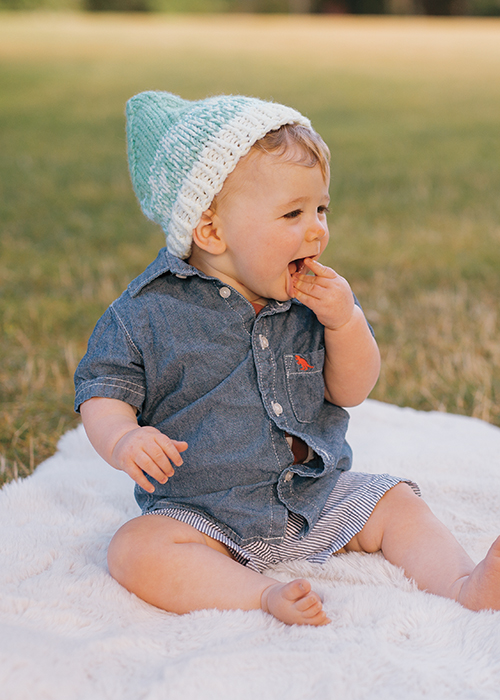
This weeks free pattern is Pixie Hat from KnitPicks.
Pixie Hat
Finished Measurements Babies (toddlers, children), 16 (17, 19)” head circumference
Needles US 11 (8.0mm) 16” circular needles and DPNs

Yarn is held 2 strands together at all times. You decide which is color A and color B 

Directions
With 16” circular and 2 strands of color A, CO 48 (52, 56) stitches. Place a marker and join into a round, being careful not to twist stitches. Work 5 (6, 7) rounds in [k1,p1] rib. (If you want a fold-up cuff, continue in rib for a total of 3 or 4 inches.) Cut one strand of color A, then join remaining A together with one strand of color B. Knit 10 (12, 14) rounds. Cut color A and join another strand of color B. (Color A is finished) Knit one round with 2 strands color B. Pixie shaping: 

Rnd 1: *[K10 (11, 12) k2tog] repeat from * to end of round. 
Rnd 2: Knit 
Rnd 3: *[K9 (10, 11) k2tog] rep from * to end of round. 
Rnd 4: Knit. 
Rnd 5: *[K8 (9, 10) k2tog] rep from * to end. 
Rnd 6: Knit. 
Rnd 7: *[K7 (8, 9) K2tog] rep from * to end. 
Rnd 8: Knit. 
Rnd 9: *[K6 (7, 8) k2tog] rep from * to end. 
Rnd 10: Knit. 
Rnd 11: *[K5 (6, 7) k2tog] rep to end. 
Rnd 12: Knit. 
Rnd 13: *[K4 (5, 6) k2tog] rep to end. 
Rnd 14: Knit. 
Rnd 15: *[K3 (4, 5) k2tog] rep to end. 
Rnd 16: Knit. 
Rnd 17: *[K2 (3, 4) k2tog] rep to end. 
Rnd 18: Knit. 
Rnd 19: *[K1(2, 3) k2tog] rep to end. 
Rnd 20: Knit Jump ahead to round 25 for smallest size. 
Rnd 21: Med and Large sizes: *[K1 (2), k2tog] rep to end. 
Rnd 22: Knit Jump ahead to round 25 for medium size.
Rnd 23: Largest size only: *[K1, k2tog] rep to end. 
Rnd 24: Knit 
Rnd 25: K2tog [4] times. Break yarn, leaving a 10” tail. 

Finishing Thread a tapestry needle and pull yarn through remaining 4 sts. Thread tail through stc once more to secure, tighten, and tuck end through to the inside of the hat. Weave in loose ends.

The Original Pattern can be found at http://www.knitpicks.com/patterns/Pixie_Hat__D55673220.html

Saturday, March 3, 2018

Baby - Making Baby Food

Hello Everyone!

I have just made my son a ton of  baby food. It was quick, cheep, easy, and didn't require a ton of clean up. I used http://wholesomebabyfood.momtastic.com for the info on each item from, how to pick it, cook it, process it, store it and what age is it good to introduce. I would encourage parents who are trying to make their own baby food to check this site out

Monday, February 26, 2018

Free Pattern of the Week!

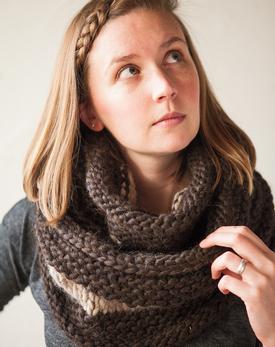
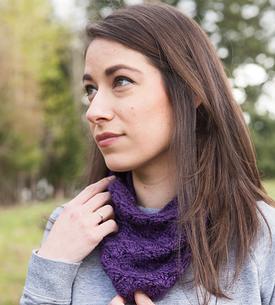
This weeks free pattern is InfiniTea Cowl Dishcloth from KnitPicks.
InfiniTea Cowl
Finished Measurements 56.5” circumference x 9.25” high
Needles US 15 (10mm) 40” or 47” circular needle

Basic knitting in the round skills needed. When knitting in the round, knitting every round will produce St st, and knitting one round and purling the next round will produce the Garter st, which is opposite of when you knit flat. 

Stockinette Stitch (St st, worked in the round over any number of sts) All Rounds: K all sts. 

Garter Stitch (worked in the round over any number of sts) Round 1: K all sts. Round 2: P all sts. Rep Rounds 1 and 2 for pattern. 

Directions 
This cowl is done in three sections, using two colors: Color C1, then color C2, then color C1 again. If you prefer, you can complete the cowl with 3 different colors or all one color. 

Section One 
Using C1, CO 120 sts using Long Tail Cast On. 
Carefully join for circular knitting without twisting the sts. 
Place marker at join to mark beginning of round, and begin working in St st: 
Rounds 1-4: Knit. Then work in Garter Stitch: 
Round 5: Knit. 
Round 6: Purl. 
Rounds 7-10: 
Repeat Rounds 5 and 6 twice more. 
Break off yarn. 

Section Two
 Join C2 at stitch marker and work in St st: Rounds 1-10: Knit Break off yarn. 

Section Three Join C1 at stitch marker and work in Garter Stitch: 
Round 1: Knit. 
Round 2: Purl. 
Rounds 3-6: Repeat Rounds 1 and 2 twice more. 
Begin working in St st: Rounds 7 -10: Knit. BO all sts loosely p-wise. 
Break off yarn 

Finishing Weave in ends, wash and block to finished measurements.

The Original Pattern can be found at http://www.knitpicks.com/patterns/InfiniTea_Cowl__D55719220.html

Saturday, February 24, 2018

Baby - Teach Your Baby Sign Language, the Easy Way


Teach Your Baby Sign Language, the Easy Way
Don't speak baby talk? Don't worry. Use these easy tips to teach your baby some simple sign language skills and finally understand what goo-goo gah-gah really means.
By Lori Miller Kase from Parents Magazine
Teaching Baby How to Communicate with Hands
When Naomi Martinez's son, Caleb, was a baby, she'd put him into his high chair each morning, give him a bottle, and then greet their dog as she trotted into the kitchen. "Hi, Chelsea," the Newington, Connecticut, mom would say, and then she'd wave (the universal sign for hello) and pant (a signal for dog).

Caleb isn't deaf, but Martinez hoped that using sign language like this would help her communicate with her son until he learned how to speak. One day Chelsea didn't show up at breakfast time. Caleb, then 7 months, removed the bottle from his mouth and starting panting. "When I called Chelsea and she came into the room, he squealed with excitement," Martinez recalls. "Caleb wanted our dog next to him, and he had figured out a way to express that to me."

Babies understand words long before they can start to utter them. "Kids are beginning to connect the sound of words with what they mean by around 6 to 8 months," says Gerald W. McRoberts, Ph.D., a scientist at Haskins Laboratories, a speech-and-language research institute. Around the same time, your child is learning how to use gestures to tell you something. He might hold out his arms when he wants to be picked up or point to an object that interests him. These motions show that he's eager to communicate any way he can.

While it's never too early to introduce signs, your child is likely ready to start using them when you see him paying attention to his hands (or yours)—playing with them, bringing them to his mouth, or using them to pick up his toys.Wondering whether signing is worth the effort? Consider these benefits: Using sign language with your baby gives you a peek into his thoughts, which helps cement your bond, says Michelle Macias, M.D., chair of the section on developmental and behavioral pediatrics for the American Academy of Pediatrics. Signing may also cut down on the frustration (and tantrums) caused by your child's inability to convey his needs. And it might even make your kid smarter. Studies have found that babies who were taught to sign had a larger vocabulary at 12 months than those who weren't.

Conversation Starters
While some parents may be concerned that teaching their baby to sign will make her less interested in speaking, studies have found the exact opposite to be true: Signing actually speeds up the process of learning to talk. "It's not intended to be a substitute for verbal-language expression but rather a bridge toward it," says Adilen Figueroa, who teaches a Sign, Say, and Play class in Hartford, Connecticut.

The progression from conversing with his hands to communicating with his mouth makes perfect sense, says Linda Acredolo, Ph.D., coauthor of Baby Signs: How to Talk With Your Baby Before Your Baby Can Talk. When a child starts to sign with his parents, they naturally tend to talk to him more. And the more words a baby hears, the faster he learns to use them. 

Dr. Acredolo began the baby-sign movement during the 1980s after noticing her then-infant daughter, Kate, point to a rose in the garden, wrinkle her nose, and sniff. Kate repeated this identical action every time she spotted a flower, even if it was in a picture book or on an article of clothing. Soon Kate had invented signs for other things that she found intriguing and wanted to point out, including fish, monkeys, swings, and balls. Subsequent studies by Dr. Acredolo and Susan Goodwyn, Ph.D., found that most babies create some of their own signals for objects, and that discovery led them to develop baby-friendly signs for common words that parents could teach.

Think of signing as one step in the communication process: Your baby goes from comprehending that a thing equals a word or a sign, to producing the hand gestures that represent it, to articulating her first spoken word (generally sometime between 10 and 14 months). When your child displays the sign for a ball—moving her hands together so her fingertips touch, then separating them—repeat it. Then boost her vocabulary by saying, "Yes, that is a big ball. A red ball!" Research shows that when you talk about things that interest your baby, she'll learn words more easily. 

Hands On
Just as you start speaking to your baby long before he can talk back, you can begin using signs as soon as you like. Martinez and her husband introduced signing the day Caleb was born because they wanted it to become second nature to him. 

Whichever signs you decide to teach first, they should be used in addition to speaking aloud, experts say. It's important to show the sign and say the word or phrase every time. Figueroa suggests starting with mealtime signs, since your child eats multiple times a day—and because most babies are fascinated by food as they begin to branch out into a variety of solids. "Milk" is an easy first sign for babies to learn: You open and close your fist as if you're milking a cow. When handing your baby a bottle, say, "Here's your milk" while using the symbol. "More," "sleep," "Mommy," "Daddy," and "bye-bye" are some other early signs you can try. 
Don't be discouraged if your baby doesn't mimic a sign right away. You'll probably need to demonstrate it repeatedly for up to a few weeks before he picks it up. Once he does, though, watch out: He'll be telling you what he wants—and you'll need to be ready to respond.

I did not write this article. To find the original and others like it please visit https://www.parents.com/baby/development/intellectual-growth/

Thursday, February 22, 2018

Stay at home mom

Image result for stay at home mom clip art
When my husband and got pregnant we realized that it would be better for me to be a stay at home mom instead of working. Recently I was speaking with someone and they asked me my families 5 year plan. I told them about that my husband would continue working and go to school, we might move and I might have another kid, resulting in me continuing to be a Stay-At-Home-Mom until my children are in school.

I was shocked when they responded "So, you are just not going to be a productive member of society anymore?"

I had so many responses come to my brain, all angry, that I froze. Luckily for them, my sister-in-law changed the subject. I could not believe that someone would say that to me. I am a hard working woman, I am not just watching Disney movies. I am taking care of my family and trying to give my children (the next generation) a strong foundation. This person also told me in a previous conversation that they could not understand why I don't have anytime to make all of my families food from scratch (apparently making my babies food from scratch does not count).

I thought to myself, "They are crazy. They don't have kids and don't know what it is like. One day, they will figure it out." I spoke with other mothers (stay-at-home and working) and they were outraged that people would think so little of my life choice.


I found a wonderful article about the worth of being a stay at home mom at https://www.forbes.com/sites/jennagoudreau/2011/05/02/why-stay-at-home-moms-should-earn-a-115000-salary/#49f151aa75f4.

Why Stay-At-Home Moms Should Earn A $115,000 Salary
Think you can't put a price on motherhood? According to a new survey by Salary.com, a division of human resources consultant Kenexa, moms should be charging $115,000 per year for their work.

In the tenth annual Mom Salary Survey, researchers examined 6,616 mothers and attempted to value their work by breaking down motherly duties into 10 separate titles: Day Care Center Teacher, CEOPsychologist, Cook, Housekeeper, Laundry Machine Operator, Computer Operator, Facilities Manager, Janitor and Van Driver.
Call it continuing fallout from the global recession, but in 2011 stay-at-home moms' estimated wages dropped. This year, results indicate that stay-at-home moms would earn a base salary of $36,968 plus $78,464 in overtime, totaling $115,432--down $2,424 from last year's estimation of $117,856. Meanwhile, moms that work outside the home earned a “mom” base salary of $39,763 plus $23,709 in overtime, adding $63,472  on top of their day jobs.

"We see [Mom] as the compilation of 10 jobs in one person," said Evilee Ebb, general manager of Salary.com. "The breadth of Mom’s responsibilities is beyond what most workers could ever experience day-to-day. Imagine if you had to attract and retain a candidate to fill this role?”

According to the survey, the typical stay-at-home mom works almost 97 hours a week, spending 13.2 hours as a day-care teacher; 3.9 hours as household CEO; 7.6 hours as a psychologist; 14.1 hours as a chef; 15.4 as a housekeeper; 6.6 hours doing laundry; 9.5 hours as a PC-or-Mac operator; 10.7 hours as a facilities manager; 7.8 hours as a janitor and 7.8 hours driving the family Chevy.

Salary.com aimed to market price Mom in the same manner it prices a job. For 10 titles, a nearly 100-hour work-week and a six-figure annual rate, moms may be the most valuable workers in the country.

Monday, February 19, 2018

Free Pattern of the Week!

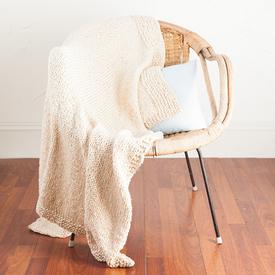
This weeks free pattern is Pima Afghan from KnitPicks.
Pima Afghan
FINISHED MEASUREMENTS 49” x 40”
NEEDLES US 11 (8.0mm) 48” circular needle.

This gorgeously soft, drapey afghan knits up quickly at a loose gauge. Two strands of the Pima Cotton Special Reserve yarn are held double throughout giving the blanket a satisfying weight and warmth, perfect for any season. This yarn is also dyeable and machine washable making this blanket infinitely customizable and easy to care for. 

Directions 
CO 102 sts with yarn held double. 
Bottom Border Work 8 rows of garter stitch (K each row). 
Body Row 1 (WS): K4, P to last four stitches, K4. Row2 (RS): K Repeat rows 1-2 until the blanket measures 45” from cast on edge ending with a row 2.

The Original Pattern can be found at 


http://www.knitpicks.com/patterns/Pima_Afghan__D55722220.html

Saturday, February 17, 2018

Baby - 7 Tips for Disciplining Your Toddler


7 Tips for Disciplining Your Toddler

Keep your kids in line with these simple strategies.
As a 2-year-old, Nathaniel Lampros, of Sandy, Utah, was fascinated with toy swords and loved to duel with Kenayde, his 4-year-old sister. But inevitably, he'd whack her in the head, she'd dissolve in tears, and Angela, their mother, would come running to see what had happened. She'd ask Nathaniel to apologize, as well as give Kenayde a hug and make her laugh to pacify hurt feelings. If he resisted, Angela would put her son in time-out.

"I worried that Nathaniel would never outgrow his rough behavior, and there were days when I'd get so frustrated with him that I'd end up crying," recalls Lampros, now a mother of four. "But I really wanted Nathaniel to play nicely, so I did my best to teach him how to do it." 

For many mothers, doling out effective discipline is one of the toughest and most frustrating tasks of parenting, a seemingly never-ending test of wills between you and your child. Because just when your 2-year-old "gets" that she can't thump her baby brother in the head with a doll, she'll latch on to another bothersome behavior -- and the process starts anew.

What exactly does it mean to "discipline" a toddler? Some people equate it with spanking and punishment, but that's not what we're talking about. As many parenting experts see it, discipline is about setting rules to stop your little one from engaging in behavior that's aggressive (hitting and biting), dangerous (running out in the street), and inappropriate (throwing food). It's also about following through with consequences when he breaks the rules -- or what Linda Pearson, a Denver-based psychiatric nurse practitioner who specializes in family and parent counseling, calls "being a good boss." Here are seven strategies that can help you set limits and stop bad behavior.

 Toddler Boy on Dad's Shoulder

1. Pick Your Battles

"If you're always saying, 'No, no, no,' your child will tune out the no and won't understand your priorities," says Pearson, author of The Discipline Miracle(AMACOM). "Plus you can't possibly follow through on all of the nos.'" Define what's important to you, set limits accordingly, and follow through with appropriate consequences. Then ease up on little things that are annoying but otherwise fall into the "who cares?" category -- the habits your child is likely to outgrow, such as insisting on wearing purple (and only purple).

For Anna Lucca, of Washington, D.C., that means letting her 2-1/2-year-old daughter trash her bedroom before she dozes off for a nap. "I find books and clothes scattered all over the floor when Isabel wakes up, so she must get out of bed to play after I put her down," Lucca says. "I tell her not to make a mess, but she doesn't listen. Rather than try to catch her in the act and say, 'No, no, no,' I make her clean up right after her nap." Lucca is also quick to praise Isabel for saying please and sharing toys with her 5-month-old sister. "Hopefully, the positive reinforcement will encourage Isabel to do more of the good behavior -- and less of the bad," she says.


2. Know Your Child's Triggers

Some misbehavior is preventable -- as long as you can anticipate what will spark it and you create a game plan in advance, such as removing tangible temptations. This strategy worked for Jean Nelson, of Pasadena, California, after her 2-year-old son took delight in dragging toilet paper down the hall, giggling as the roll unfurled behind him. "The first two times Luke did it, I told him, 'No,' but when he did it a third time, I moved the toilet paper to a high shelf in the bathroom that he couldn't reach," Nelson says. "For a toddler, pulling toilet paper is irresistible fun. It was easier to take it out of his way than to fight about it."

If your 18-month-old is prone to grabbing cans off grocery store shelves, bring along some toys for him to play with in the cart while you're shopping. If your 2-year-old won't share her stuffed animals during playdates at home, remove them from the designated play area before her pal arrives. And if your 3-year-old likes to draw on the walls, stash the crayons in an out-of-reach drawer and don't let him color without supervision. Also, some children act out when they're hungry, overtired, or frustrated from being cooped up inside, says Harvey Karp, MD, creator of the DVD and book The Happiest Toddler on the Block (Bantam). Make sure your child eats healthy snacks, gets enough sleep (a minimum of 10 hours at night, plus a one- to two-hour nap),
and plays outside to burn off energy -- even in chilly weather.


3. Be Consistent

"Between the ages of 2 and 3, children are working hard to understand how their behavior impacts the people around them," says Claire Lerner, LCSW, director of parenting resources with Zero to Three, a nationwide nonprofit promoting the healthy development of babies and toddlers. "If your reaction to a situation keeps changing -- one day you let your son throw a ball in the house and the next you don't -- you'll confuse him with mixed signals."

There's no timetable as to how many incidents and reprimands it will take before your child stops a certain misbehavior. But if you always respond the same way, he'll probably learn his lesson after four or five times. Consistency was key for Orly Isaacson, of Bethesda, Maryland, when her 18-month-old went through a biting phase. Each time Sasha chomped on Isaacson's finger, she used a louder-than-usual voice to correct her -- "Nooooooooo, Sasha! Don't bite! That hurts Mommy!" -- and then handed her a toy as a distraction. "I'm very low-key, so raising my voice startled Sasha and got the message across fast," she says. A caveat: by age 2, many kids learn how to make their parents lose resolve just by being cute. Don't let your child's tactics sway you -- no matter how cute (or clever) they are.


4. Don't Get Emotional

Sure, it's hard to stay calm when your 18-month-old yanks the dog's tail or your 3-year-old refuses to brush his teeth for the gazillionth night in a row. But if you scream in anger, the message you're trying to send will get lost and the situation will escalate -- fast. "When a child is flooded with a parent's negative mood, he'll see the emotion and won't hear what you're saying," explains William Coleman, MD, professor of pediatrics at the University of North Carolina Medical School, in Chapel Hill. Indeed, an angry reaction will only enhance the entertainment value for your child, so resist the urge to raise your voice. Take a deep breath, count to three, and get down to your child's eye level. Be fast and firm, serious and stern when you deliver the reprimand.


5. Keep It Short and Simple

If you're like most first-time mothers, you tend to reason with your child when she breaks rules, offering detailed explanations about what she did wrong and issuing detailed threats about the privileges she'll lose if she doesn't stop misbehaving. But as a discipline strategy, overtalking is as ineffective as becoming overly emotional, warns Dr. Coleman. While an 18-month-old lacks the cognitive ability to understand complex sentences, a 2- or 3-year-old with more developed language skills still lacks the attention span to absorb what you're saying. Instead, speak in short phrases, repeating them a few times and incorporating vocal inflections and facial expressions, Dr. Coleman advises. For example, if your 18-month-old swats your arm, say, "No, Jake! Don't hit Mommy! That hurts! No hitting. No hitting." A 2-year-old can comprehend a bit more: "Evan, no jumping on the sofa! No jumping. Jumping is dangerous -- you could fall. No jumping!" And a 3-year-old can process cause and effect, so state the consequences of the behavior: "Ashley, your teeth need to be brushed. You can brush them -- or I can brush them for you. You decide. The longer it takes, the less time we'll have to read Dr. Seuss."


6. Give a Time-Out

If repeated reprimands, redirection, and loss of privileges haven't cured your child of his offending behavior, consider putting him in time-out for a minute per year of age. "This is an excellent discipline tool for kids who are doing the big-time no-nos," Dr. Karp explains. Before imposing a time-out, put a serious look on your face and give a warning in a stern tone of voice ("I'm counting to three, and if you don't stop, you're going to time-out. One, two, THREE!"). If she doesn't listen, take her to the quiet and safe spot you've designated for time-outs, and set a timer. When it goes off, ask her to apologize and give her a big hug to convey that you're not angry. "Nathaniel hated going to time-out for hitting his sister with the plastic sword, but I was clear about the consequences and stuck with it," says Angela Lampros. "After a few weeks, he learned his lesson." Indeed, toddlers don't like to be separated from their parents and toys, so eventually the mere threat of a time-out should be enough to stop them in their tracks.


7. Stay Positive

No matter how frustrated you feel about your child's misbehavior, don't vent about it in front of him. "If people heard their boss at work say, 'I don't know what to do with my employees. They run the company, and I feel powerless to do anything about it,' they'd lose respect for him and run the place even more," says Pearson. "It's the same thing when children hear their parents speak about them in a hopeless or negative way. They won't have a good image of you as their boss, and they'll end up repeating the behavior."

Still, it's perfectly normal to feel exasperated from time to time. If you reach that point, turn to your spouse, your pediatrician, or a trusted friend for support and advice.


Ages & Stages

Effective discipline starts with understanding where your child falls on the developmental spectrum. Our guide:
·         At 18 months your child is curious, fearless, impulsive, mobile, and clueless about the consequences of her actions -- a recipe for trouble. "My image of an 18-month-old is a child who's running down the hall away from his mother but looking over his shoulder to see if she's there and then running some more," says William Coleman, MD, professor of pediatrics at the Center for Development and Learning at the University of North Carolina Medical School, in Chapel Hill. "Though he's building a vocabulary and can follow simple instructions, he can't effectively communicate his needs or understand lengthy reprimands. He may bite or hit to register his displeasure -- or to get your attention. Consequences of misbehavior must be immediate. Indeed, if you wait even 10 minutes to react, he won't remember what he did wrong or tie his action to the consequence, says Linda Pearson, a Denver-based psychiatric nurse practitioner.

·         At age 2 your child is using her developing motor skills to test limits, by running, jumping, throwing, and climbing. She's speaking a few words at a time, she becomes frustrated when she can't get her point across, and she's prone to tantrums. She's also self-centered and doesn't like to share. "People call it the terrible twos, but it's really the 'autonomous twos,'" Dr. Coleman says. Consequences should be swift, as a 2-year-old is unable to grasp time. But since she still lacks impulse control, give her another chance soon after the incident, says Claire Lerner, LCSW, director of parenting resources with Zero to Three, a nationwide nonprofit promoting the healthy development of babies and toddlers.

·         At age 3 your child is now a chatterbox; he's using language to argue his point of view. Since he loves to be with other children and has boundless energy, he may have a tough time playing quietly at home. "Taking a 3-year-old to a gym or karate class will give him the social contact he craves and let him release energy," says Harvey Karp, MD, an assistant professor of pediatrics at the University of California-Los Angeles Medical School. "At this age, kids need that as much as they need affection and food." He also knows right from wrong, understands cause and effect, and retains information for several hours. Consequences can be delayed for maximum impact, and explanations can be more detailed. For example, if he hurls Cheerios at his sister, remind him about the no-food-throwing rule and explain that if he does it again, he won't get to watch Blues Clues. If he continues to throw food, take it away from him. When he asks to watch TV, say, "Remember when Mommy told you not to throw cereal -- and you did anyway? Well, Mommy said the consequence is no Blues Clues today.
All content here, including advice from doctors and other health professionals, should be considered as opinion only. Always seek the direct advice of your own doctor in connection with any questions or issues you may have regarding your own health or the health of others.

I did not write this article. For the Original and others like it please visit https://www.parents.com/toddlers-preschoolers/discipline/tips/7-tips-for-disciplining-your-toddler/

Monday, February 12, 2018

Free Pattern of the Week!

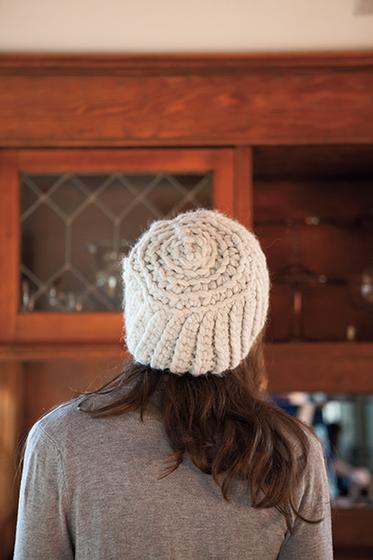
This weeks free pattern is Longitude Hat from KnitPicks.
Finished Measurements 22” circumference x 6” deep
Hooks US Q/19 (15mm)

When working in rounds, work first stitch in same stitch as join. Join means connect last stitch in round to first stitch using a slip stitch. All stitches are worked in the back loop except for the set-up rounds of the brim and top of crown. Stretch is vertical and horizontal, but more horizontal so consider fit preference – snug vs. loose. A 17” fabric may fit up to 20” head circumference.
sc2tog (Single crochet two together) Insert hook in next stitch, yarn over and pull up loop (2 loops on hook), insert hook in next stitch, yarn over and pull up loop (3 loops on hook), yarn over and draw through all 3 loops on hook —1 stitch decreased 

Directions Ch 11. 
Row 1: Working in BLO (bump of chain), SC in the second ch from hook and in each ch across, turn. (10 sc) 
Row 2 (WS): Ch 1, Sl St in BLO of each sc across row, turn. (10 sl st) 
Row 3 (RS): SC in BLO of each sl st across row, turn. (10 sc) 
Rep Rows 2-3 for desired fit. For adult size, work a total of 44 rows for about 22” 
Place RS together, matching up stitches, and with WS facing, sl st through strands that are touching, one from each stitch along. Do not fasten off. Turn work right side out. 

Brim
 Rnd 1: Working along row edges, SC in each row around, join. 
Rnd 2: Ch 1, working in BLO, SC in each sc around, join. 
Fasten off. Weave in ends. 

Top 
Attach yarn to top edge at seam. 
Rnd 1: Working in row edges, *SC in the next 3 sts, SC2tog; rep from * to end of rnd, join. Work in BLO for remaining rounds. 
Rnd 2: Ch 1, SC in the next 2 sc, SC2tog; rep from * around to end of rnd, join. 
Rnd 3: Ch 1, *SC in the next sc, SC2tog; rep from * around to end of rnd, join. 
Rnd 4: Ch 1, (SC2tog) 2 times, SC in the next sc; rep from * around, ending with SC in last 2 sts, join. 
Rnd 5: *SC2tog; rep from * around to end of rnd, join. 
Rnd 6: *SC2tog; rep from * around to end of rnd, join.. Leaving a 24” length of yarn for weaving, fasten off. 
Weave stitches together and use length to fill gaps from decreases 

Finishing Weave in any remaining ends, wash and block..


The Original Pattern can be found at http://www.knitpicks.com/patterns/Longitude_Hat__D55717220.html

Monday, February 5, 2018

Free Pattern of the Week!

This weeks free pattern is Simple Shells Cowl from KnitPicks.
Simple Shells Cowl
Finished Measurements Approximately 10” wide x 22”circumference, blocked.
Hooks US G/7 (4.5 mm)

 This cowl is created as one piece worked in the round. A stitch marker is placed to indicate beg of rnd. 
FSC (Foundation single crochet) Ch 2, insert hook into second ch from hook and pull up a loop, Ch 1, YO and pull through both loops, *insert hook into ch just made, pull up a loop, Ch 1, YO and pull through both loops; rep from * until desired number of single crochet is reached. 

Directions 
Rnd 1: FSC 74, join last st to first st with Sl St, being careful to not twist. 
Rnd 2: Ch 1, SC in same st as join (mark this st), Ch 1, Sk next 2 sc, *5 TR in next sc, Ch 1, Sk next 2 sc, Sc in next sc, Ch 1, Sk next 2 sc; rep from * around to marked st. 
Rnd 3: Work 5 tr in marked st (move st marker to 3rd tr in set), Ch 1, Sk next 2 tr, *SC in next tr, Ch 1, Sk next 2 tr, 5 TR in next sc, Ch 1, Sk next 2 tr; rep from * around to marked st. 
Rnd 4: SC in marked st (mark this st), Ch 1, Sk next 2 tr, *5 TR in next sc, Ch 1, Sk next 2 tr, SC in next tr, Ch 1, Sk next 2 tr; rep from * around to marked st. 
Rep Rnds 3-4 until piece measures approximately 10” or desired width. 
Last Rnd: SC in each sc and tr around, skipping all ch spaces. 

Finishing Weave in ends, wash and block. 


The Original Pattern can be found at http://www.knitpicks.com/patterns/Simple_Shells_Cowl__D55691220.html

Monday, January 29, 2018

Free Pattern of the Week!

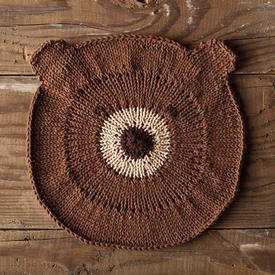
This weeks free pattern is Bear with me Dishcloth from KnitPicks.
Bear With Me Dishcloth
FINISHED MEASUREMENTS 9.25" diameter
 NEEDLES US 6 (3.5 mm) DPNs and 16” circular needle

This adorable dishcloth uses Elizabeth Zimmermann's Pi shawl ratio to create a flat circle. The ears are knitted flat after binding off the main circle., and the eyes are done using duplicate stitch. 

DIRECTIONS
Using CC2, cast on 8 sts onto DPNs. join into round, being careful not to twist sts. 
Knit 2 rnds. Next rnd: *M1, K1*, rep from * to end of rnd. 
Switch to CC1. Knit 2 rnds. 
Next rnd: *M1, K1*, rep from * to end of rnd. 
Knit 3 rnds. Switch to MC. Knit 1 rnd. 
Next rnd: *K1, M1*, rep from * to end of rnd. 
Knit 8 rnds. 
Next rnd: *K1, M1*, rep from * to end of rnd. 
Knit 9 rnds. 
Bind off 26 sts. Cut yarn. Put next 9 sts on holder or scrap yarn. Reattach yarn, and bind off next 20 sts. Cut yarn, and put next 9 sts on holder or scrap yarn. Reattach yarn and BO rest of sts. 

Ears
Put 9 sts from holder on needles. 
Row 1: Knit. 
Row 2: Purl. 
Row 3: Knit. 
Row 4: Purl. 
Row 5: BO 1 st, k7, BO 1 st. 
Row 6: BO 1 st pwise, p5, BO 1 st pwise. Row 7: BO all sts kwise. 

Finishing
 Weave in ends. Using duplicate stitch, create eyes over a square of four sts. Best placement for the eye stitches is to make the inside eye sts roughly even with the outside edges of the CC1 circle and about two stitches above it. See photo for guide.


The Original Pattern can be found at
http://www.knitpicks.com/patterns/Bear_With_Me_Dishcloth__D55585220.html

Monday, December 25, 2017

Free Patterns of the Week!

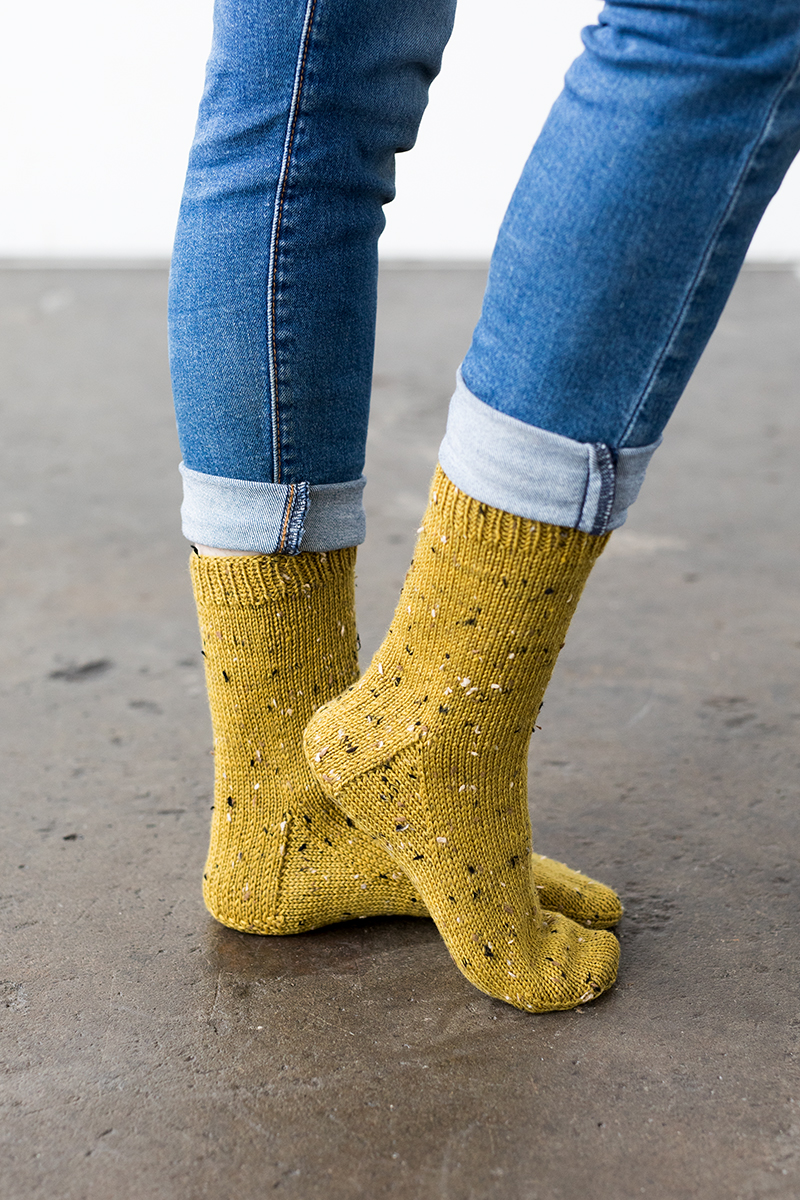
This weeks free patterns are Socks from KnitPicks. Everyone loves warmth, so make those you love something warm for their feet!

Top Down Socks

Notes: This is a simple top down sock, perfect for those wanting to practice their sock making skills. This pattern is easily adaptable for DPNs, Magic Loop or 2 circulars so you can use your favorite knitting method. For the perfect fit, measure around the widest part of your foot for the circumference and choose the size slightly smaller than your measurement (for instance, if your foot is 7.5” around, knit the 7” size). Then measure the bottom of your foot, from heel to longest toe to determine the foot length.

This pattern was written with a 5.5” leg length -but you can make it shorter or longer; however if you do the latter you may need an additional skein of yarn.

For a tutorial on the Long Tail Cast On, please see http://tutorials.knitpicks.com/wptutorials/long-tail-cast-on/

Kitchener Stitch
Hold the two pieces of knitting parallel to one another with the wrong sides facing. Thread the working yarn with a yarn needle.

*Insert the yarn needle knitwise into the first stitch on the front knitting needle. Draw through the stitch and slip the stitch off  of the front needle. Insert the yarn needle purlwise into the next stitch on the front knitting needle. Draw through the stitch. Leave the stitch on the needle. Insert the yarn needle purlwise into the first stitch on the back knitting needle. Draw through the stitch and slip the stitch off of the back needle. Insert the yarn needle knitwise into the next stitch on the back knitting needle. Draw through the stitch. Leave the stitch on the needle. Repeat these steps beginning at the * until all of your stitches have been grafted together.

Directions
Leg
CO 44 (48, 56, 60, 64) using Long Tail Cast On or other CO method. 22 (24, 28, 30, 32) sts will be for instep, 22 (24, 28, 30, 32) will be for the heel. Divide over your needles; for DPNs, it is easiest is to have your heel sts on one DPN and instep sts divided evenly between 2 DPNs - 11 (12, 14, 15, 16) sts on each instep DPN. If you prefer using 5 DPNs, divide both heel & instep sts evenly over the 4 needles but be sure remember which sts are your heel and instep. For 2 circulars or Magic Loop Method, each side will have 22 (24, 28, 30, 32) st. For all methods, PM to indicate heel st and join to knit in the round, making sure not to twist sts.

Next Rnd: *K1, P1* rep between ** to end of round.

Rep rnd for 1”.

Next Rnd: K all sts.

Rep rnd until leg is 5.5” long.


Heel Flap
You will be working back & forth on only the 22 (24, 28, 30, 32) heel sts for this section.
Row 1 (RS): Sl1, K to end.
Row 2 (WS): *Sl1, p1* rep to end,
Rep rows 1-2 an additional 10 (11, 13, 14, 15) times, 11 (12, 14, 15, 16) sl sts on each side of heel flap.
Turn the Heel
Row 1 (RS): Sl1 K 12 (13, 15, 16, 17), ssk, k1 turn (there will be a gap after the k1). 1 st dec.
Row 2 (WS): Sl1, p5, p2tog, p1 turn (there will be a gap after the p1). 1 st dec.
Row 3: Sl1, k to 1 st before the gap, ssk (1 st from each side of the gap), k1 turn. 1 st dec.
Row 4: Sl1, p to 1 st before the gap p2tog (1 st from each side of the gap), p1, turn. 1 st dec.
Repeat rows 3-4 until all sts have been worked.

Gusset
You will now begin to work in the round again. If using 4 DPNs, you may want to now put all instep stitches on one needle and divide the heel stitches between 2 needles.

Next Rnd: K across heel sts, then PU and k 11 (12, 14, 15, 16) sl sts along heel flap, PU & k 2 sts at top of gusset, k 22 (24, 28, 30, 32) across instep stitches, PU & k 2 sts at top of gusset, PU & k 11 (12, 14, 15, 16) along heel flap.

K across remaining heel sts, then k across instep. You are now at the start of the heel sts, pm to mark beginning of round.
Rnd 1: K1, SSK, k to last 3 sts of heel k2tog, k1, k across instep sts. 2 heel sts dec.
Rnd 2:: K all sts
Rep rnds 1-2 until you have 22 (24, 28, 30, 32) on the heel sts, 44 (48, 56, 60, 64) total.


Foot
Work in St st until total length is 2 (2, 2.5, 2.5, 2.5)” less than the total foot length, measuring from the back of the heel to the live sts.

Toe
Rnd 1: *K1, ssk, k to last 3 heel sts, k2tog, k1* rep between ** over instep sts. 4 sts dec.
Rnd 2: k all sts.
Rep rnds 1-2 8 (8, 10, 10, 10) more times until 4 (6, 6, 8, 10) sts remain for heel and 4 (6, 6, 8, 10) for instep - 8 (12, 12. 16. 20) sts total. Break yarn, leaving an 12” tail. If using DPNs, place instep stitches on one needle and heel stitches on one needle. Graft instep and heel sts together using Kitchener Stitch.

Finishing
Weave in ends and block to measurements.


The Original Patterns can be found at http://www.knitpicks.com/cfPatterns/Pattern_List_Filtered.cfm?PROJECT-TYPE=30025218&FREE-PAID=Free&showAll=yes

Monday, December 18, 2017

Free Patterns of the Week!

This weeks free patterns are Socks from KnitPicks. Everyone loves warmth, so make those you love something warm for their feet!

Go your own way socks - Toe Up Socks


Finished Measurements
6 (7, 8, 8.5 9)” foot circumference, customizable foot length and 5.5” leg length

Needles
US 2 (2.75mm): DPNs or (2) circular needles for two circular needles technique or 1 long circular needle for Magic Loop or size to optain gauge

Notions
Yarn Needle
Stitch Markers

Gauge
28 sts and 40 rows = 4” in stockinette stitch in the round, blocked.


Toe Up Socks
Notes: This is a simple toe up sock, perfect for those wanting to practice their sock making skills. This pattern is easily adaptable for DPNs, Magic Loops or 2 circulars so you can use your favorite knitting method. For the perfect fit, measure around the widest part of your foot for the circumference and choose the size slightly smaller than your measurement (for instance, if your foot is 7.5” around, knit the 7” size). Then measure the bottom of your foot, from heel to longest toe to determine the foot length. This pattern was written with a 5.5” leg length -but you can make it shorter or longer; however if you do the latter you may need an additional skein of yarn.

For a tutorial on Judy’s Magic Cast On, please see: http://tutorials.knitpicks.com/wptutorials/judys-magic-cast-on/.

Wrap and Turn (w&t):
Work until the stitch to be wrapped. If knitting: bring yarn to the front of the work, slip next st as if to purl, return the yarn to the back; turn work and slip wrapped st onto RH needle. Continue across row. If purling: bring yarn to the back of the work, slip next st as if to purl, return the yarn to the front; turn work and slip wrapped st onto RH needle. Continue across row.

Picking up wraps
Work to the wrapped st. If knitting, insert the RH needle under the wrap(s), then through the wrapped st K-wise. Knit the wrap(s) together with the wrapped st. If purling, slip the wrapped st P-wise onto the RH needle, and use the LH needle to lift the wrap(s) and place them on the RH needle. Slip wrap(s) and 
unworked st back to LH needle; purl all together through the back loop.

Stretchy Bind-off
K2, *insert the left needle into the front of the 2 sts on the right needle and knit them together - 1 st remains on right needle. K1*, rep between ** until all sts have been bound off.

Directions
Toe
Using Judy’s Magic Cast On, CO 4 (6, 6, 8, 10) sts for the instep and 4 (6, 6 8, 10) sts for the heel. K one round, dividing st between needles. For DPNs, it is easiest to have your heel sts on one DPN and instep sts divided evenly divided between 2 DPNs - 2 (3, 3, 4, 5) sts on each DPN. If you prefer using 5 DPNs, divide both heel & instep sts evenly between the 4 worrking needles, but be sure to remember which sts are your heel and instep. For 2 circulars or Magic Loop Method, each side will have 4 (6, 6, 8, 10) st. For all methods, PM to indicate heel sts and beg of round.

Rnd 2: *Kfb in the first st, k to 2 sts before the end of the heel sts, kfb, k1*; rep across instep sts. 4 sts inc.

Rnd 3: K all sts

Rep rnds 2-3 an additional 8 (8, 10, 10, 10) times. 44 (48, 56, 60, 64) sts total, 22 (24, 28, 30, 32) st for the heel and 22 (24. 28, 30, 32) sts for the instep.

Foot
Work in St st until total length is 3.5 (4, 4.75, 5, 5.25)” less than the total foot length.

Gusset
Increases will only be on the heel sts, instep will be in St st. 

Rnd 1: Kfb in the first st, k to 2 sts before end of the heel sts, kfb, K1, k across instep sts to end of round. 2 heel sts inc.
Rnd 2: k all sts
Rep rnds 1-2 an additional 9 (10, 12, 13, 14) times, then work rnd 1 once more. 66 (72, 84, 90, 96) sts total, 44 (48, 56, 60, 64) st for the heel and 22 (24, 28, 30, 32) for the instep.

Heel
You will be working back & forth on only the heel sts for this section.
Row 1 (RS): K 32 (35, 41, 44, 47) w&t
Row 2 (WS): P 20 (22, 26, 28, 30) w&t
Row 3: K to st before wrapped st, w&t
Row 4: P to st before wrapped st, w&t
Repeat rows 3-4 until 7 (8, 9, 10, 10) sts are wrapped on either side of the 8 (8, 10, 10, 12) center unwrapped sts. RS should be facing after working a row 4.

You will work 1 round over both heel & instep sts as follows:
Next Rnd: K to end of heel sts, picking up wraps as you come to them, then k across instep sts. You should now be at the beginning of the heel sts.

Heel Flap
You will be working back & forth on only the heel sts for this section.
Row 1 (RS): K 32 (35, 41, 44, 45) sts, picking up remaining wraps, SSK, turn. 1 st dec.
Row 2 (WS): *Sl1, p1* rep between ** 10 (11, 13, 14, 15) times, Sl1, p2tog, turn. 1 st dec.
Row 3: Sl1, k20 (22, 26, 28, 30), ssk, turn. 1 st dec.
Row 4: *Sl1, p1* rep between ** 10 (11, 13, 14, 15) times, sl1, p2tog, turn. 1 st dec.
Rep rows 3-4 an additional 8 (9, 11, 12, 13) times, then work row 3 once more but do not turn at end. You will now begin to work in the round again. K across instep sts to beg of heel sts.
Next Rnd: K2tog, k all sts to end. 44 (48, 56, 60, 64) sts.
Leg
Next Rnd: K all sts
Rep this round until leg is 4.5” from the top of the heel flap or to 1” less than desired finished length.
Next rnd: *K1, P1* rep between ** to end of round.
Rep rnd for 1”, then BO using Stretchy Bind-Off.
Finishing
Weave in ends and block to measurements.


The Original Patterns can be found at http://www.knitpicks.com/cfPatterns/Pattern_List_Filtered.cfm?PROJECT-TYPE=30025218&FREE-PAID=Free&showAll=yes

Monday, December 11, 2017

Free Pattern of the Week!

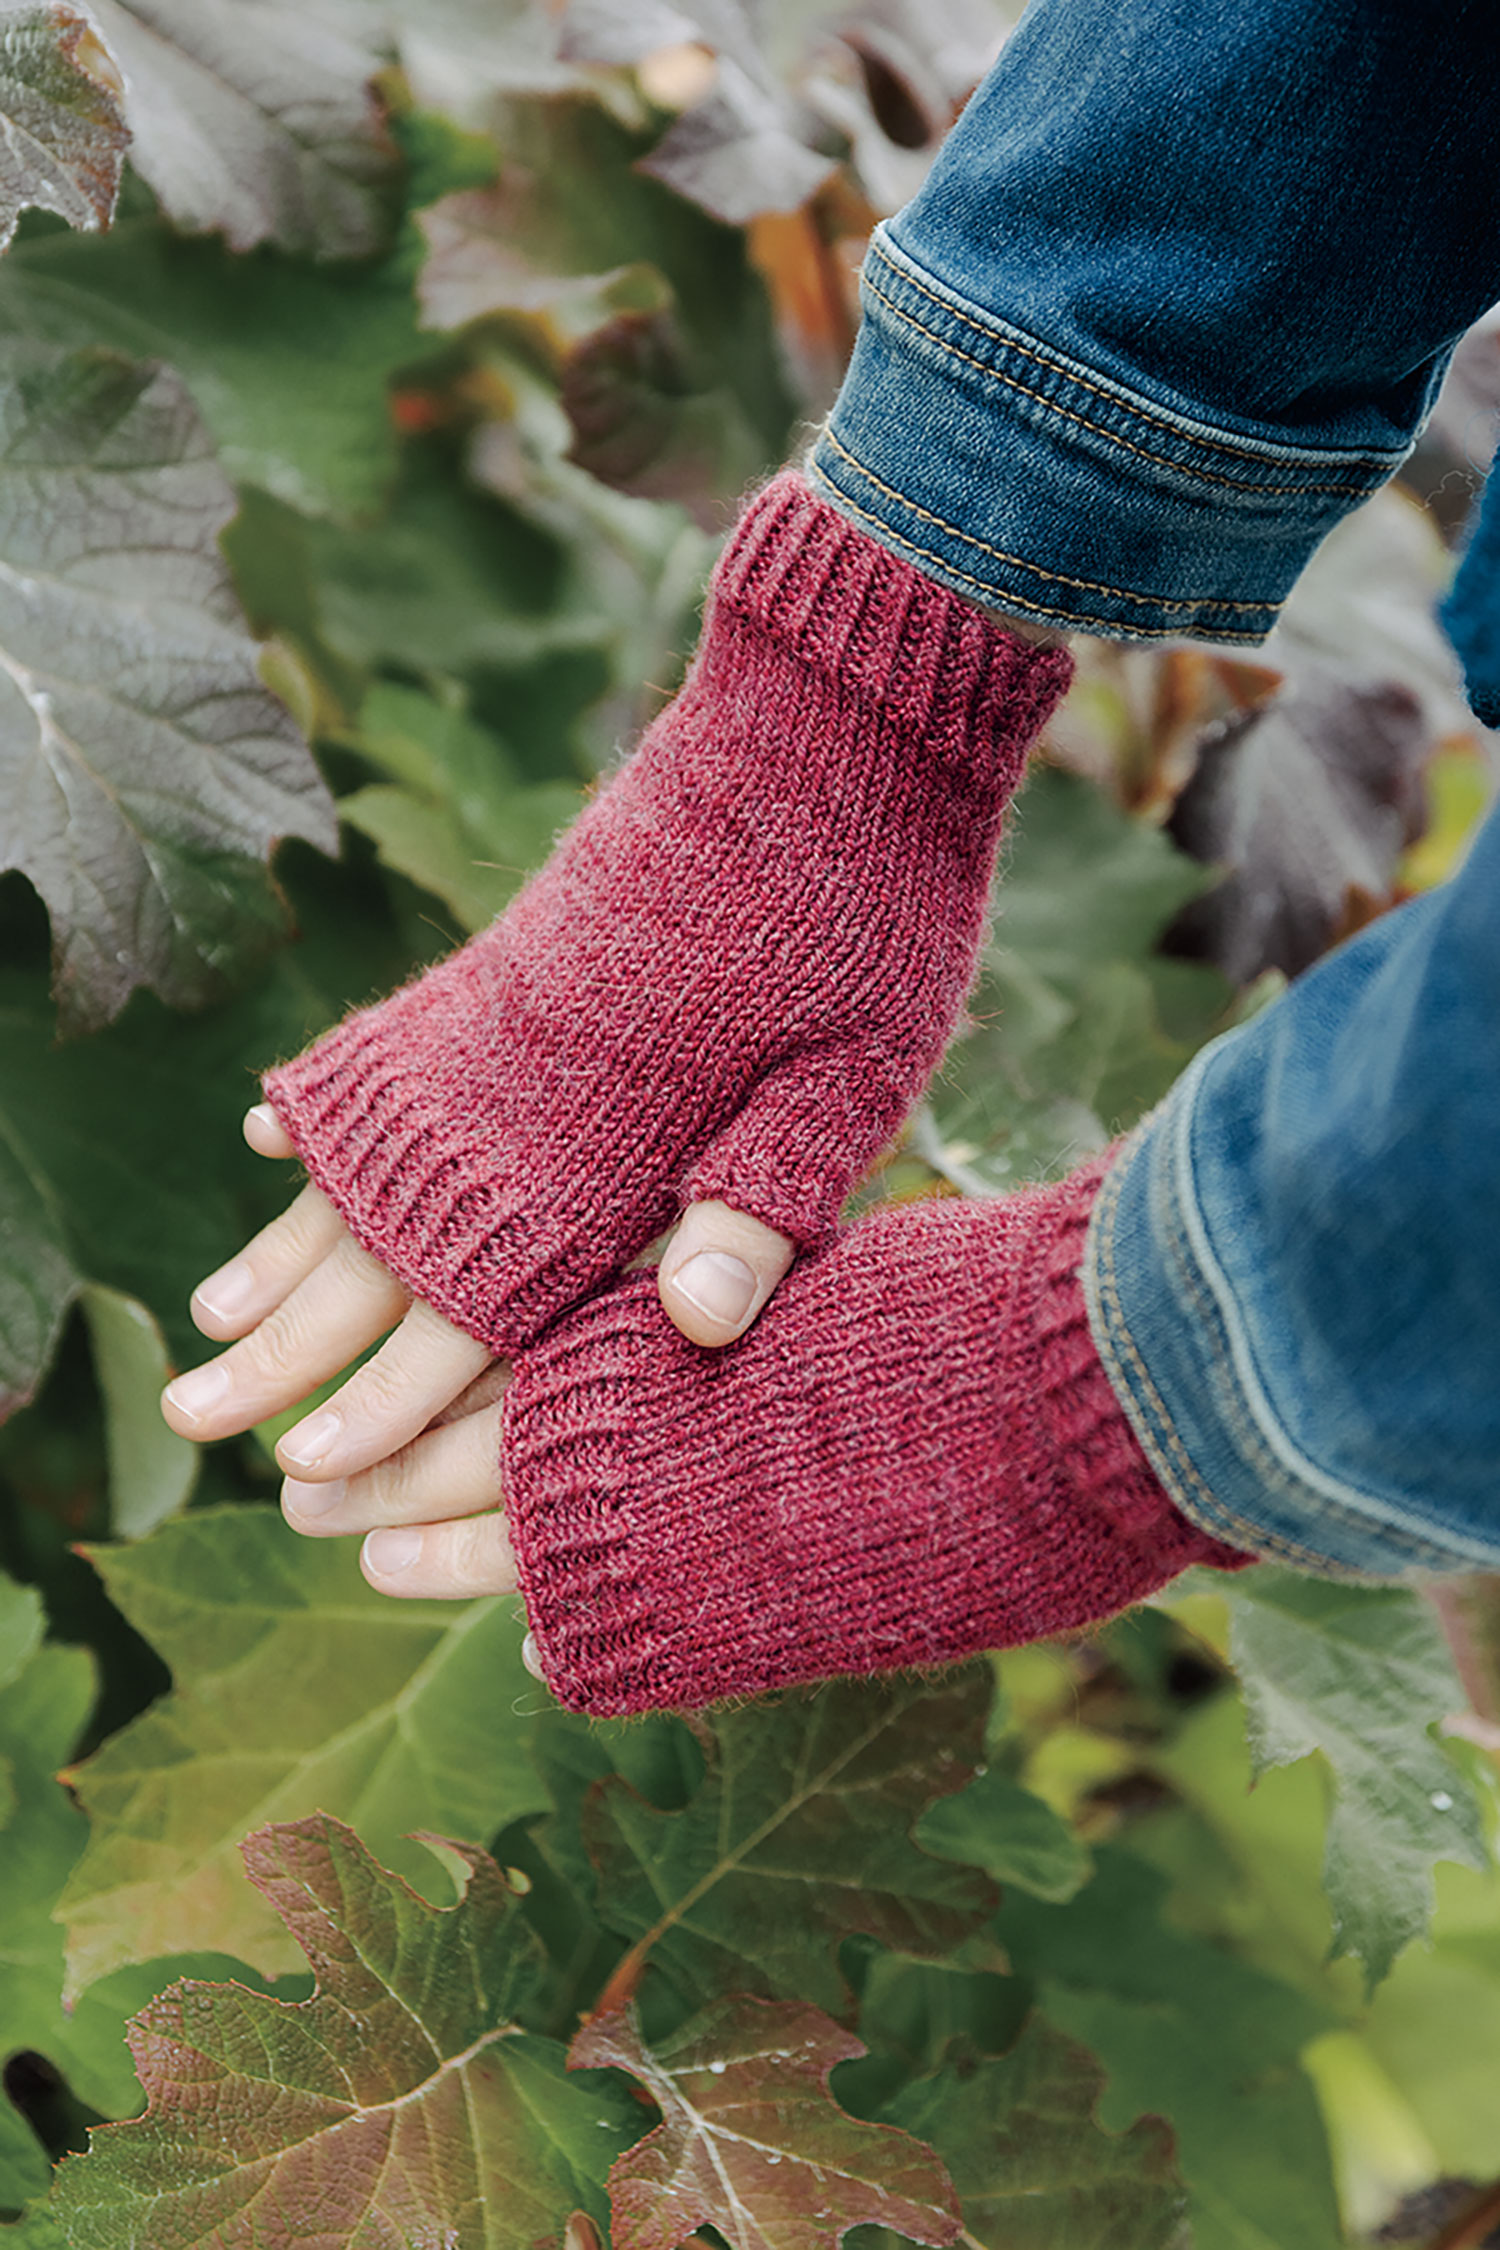
This weeks free pattern is Semplice Fingerless Mitts from KnitPicks.
Semplice Fingerless Mitts
Finished Measurements 6” (7”, 8”) palm circumference
Needles US 3 (3.5 mm) DPNs or 40” or longer circulars for Magic Loop

Twisted Rib Pattern *K1tbl, p1 repeat from * for pattern 

Directions CO 36 (42, 48) stitches, pm for beginning of the round, and join to work in the round, taking care not to twist stitches 
Work for 1” in Twisted Rib Pattern 
Work 2” (2.5” 3”) in st st 

Begin increases for thumb 
Set up round: K1, pm k to 1 stitch before the end of the round, pm K1 

Round 1: Knit to 1 stitch before 1st marker, Kf&b, sm, k to next marker, sm, Kf&b, k to end of round. 2 stitches increased. 

Round 2: k all stitches 

Repeat these 2 rounds 4 (5, 6) more times.

Set thumb aside 
K to second marker, remove marker, K 1, sl next 5 (6, 7) stitches to holder or waste yarn. 

Remove start of round marker. Sl first 5 (6,7) stitches of the next round to holder or waste yarn. 

Place marker for new beginning of the round and join to work in the round. 

Work 1” (1.5”, 2”) in st st or until 1” below desired length Work 1” in Twisted Rib pattern BO loosely. 

This can be achieved by BO with a larger needle, or using a stretchy bind off such as the one below: K2, *insert the left needle into the front of the 2 sts on the right needle and knit them together--1 st remains on right needle. K1, repeat from * until all sts have been bound off. 

Fasten off last stitch. 

Thumb Join yarn and PU & knit 10 (12, 14) thumb stitches from waste yarn, then PU & knit 4 st from join at side of hand. 

PM and join to work in the round Next round: k to last 4 stitches, k2tog, k2tog. 

12 (14, 16) st total. Work .5” (.75” 1”) in st st or to .25” below desired length K 3 rounds in Twisted Rib pattern BO loosely 


Finishing: Weave in all ends and make second mitt exactly like the first.


The Original Pattern can be found at http://www.knitpicks.com/patterns/Semplice_Fingerless_Mitts__D55478220.html

Monday, December 4, 2017

Free Pattern of the Week!

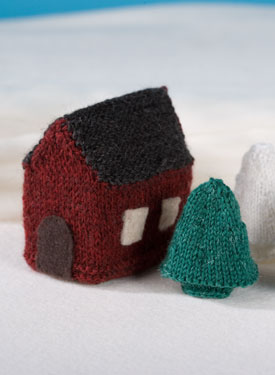
This weeks free pattern is Dwell House from KnitPicks.
Dwell House Pattern
Finished Measurements 3” tall, 3” long, 2” wide
Needles US 1 (2.25 mm) DPNs or 40” or longer circulars for Magic Loop

A quick note about foam blocks - simple florist foam is delicate and easily crushes and fl akes. If you want to avoid this, there are more solid and sturdy blocks that can be used for this purpose. 

DIRECTIONS 

Foam House 
Begin by cutting the house shape from the foam block. Use a pair of scissors to slice a piece of foam off one block that measures 3” high x 3” long x 2” wide. Then, use scissors to shave off the excess foam at the top to form a peaked roof. To do this, measure 1” from the top of the block and scored a shallow line at 1” along both long sides. Find the center at the top of the block and make a shallow mark there as well; this will be the “peak” of the cottage roof. The center mark and side scores mark the three points of the triangle. Using the scissors, place the tip of the blade at the mark that was made at the “peak” of the house and angle the blade so that it intersected with the score marked earlier. Press down while maintaining the angle until the scissors completely cut through the foam block. Repeat on the remaining side. Measure the sides of the house and clean up the edges, making sure your walls and the roof are straight and even. 

Cottage Base
 CO 60 sts with CC1. 
Arrange the stitches between four double pointed needles as follows: needles 1&3 have 18 sts each and needles 2&4 have 12 sts each. 
Join to work in the round. 
Work 4 rounds garter stitch followed by stockinette stitch until piece measures 2” from the cast-on edge. 

Gables
Needle 4 (12 sts) will be your fi rst gable. At the end of needle 4 instead of continuing to knit in the round, turn work and work one purl row across needle 4. 
Row 1: Turn work, ssk, knit across needle 4 until last two stitches, k2tog. 
Row 2:Turn, purl one row.
Repeat rows 1 & 2 until two stitches remain, k2tog, break yarn, leaving a 4 inch tail and draw through remaining stitch. 

Needle 2 (12 sts) will be your second gable. Join yarn to the wrong side of needle 2 and work one purl row across needle 2. 
Row 1:Turn work ssk, knit across needle 4 until last two stitches, k2tog. 
Row 2: Turn, purl one row. 
Repeat rows 1 & 2 until two stitches remain, k2tog, break yarn, leaving a 4 inch tail and draw through the remaining stitch. 

Roof 
Using CC2, join yarn to the right side of needle 3. 
Work garter stitch for 1.5 “. 
Leave the stitches on the needle for now and break yarn, leaving a 4 inch tail. Using CC2, join yarn to the right side of needle 1. 
Work garter stitch for 1.5 “. 
End with a right side row. 
Hold Needle 3 and Needle 1 together and bind off stitches on both needles using the Three Needle Bind off method. Use the tails to stitch the Gables to roof edges. 

Door
Use the scissors to round off one narrow side of the dark piece of felt to create a rounded door. Sew to front of cottage with dark thread. Cut two windows from the piece of off-white felt and sew to one wall of the cottage using light thread. Gently ease the knit shell over the foam base until the shell completely covers the foam. Ta dah! One cozy dwelling. 


The Original Pattern can be found at http://www.knitpicks.com/patterns/Dwell_House_Pattern__D51028220.html