Showing posts with label yarn. Show all posts

Monday, April 23, 2018

Free Pattern of the Week!

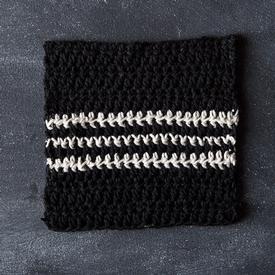
This weeks free pattern is Cookies and Cream Dishcloth from KnitPicks.
Cookies & Cream Crochet Dishcloth
Finished Measurements 6.5’ x 6.5’
Hook US I (5.5mm): crochet hook

 Much like the experience of eating a cookie, this dishcloth pattern is sweet, easy and addicting. Simple rows of half double crochet in alternating colors are worked up in a jiffy, leaving you plenty of time to finish that cookie snack. 

Directions With MC, Ch 27 (or any number of stitches +2) 

Row 1: Hdc in in 3rd ch from hook. 1hdc in every ch to end of row, turn. 

Row 2: Ch2 (does not count as st), 1hdc in every hdc to end of row, inserting the hook from front to back under both loops of each st – this looks like a “V,” turn. 

Repeat Row 2 until you have a total of 6 rows of MC. 

Row 7: Attach CC to the previous row, turn, ch 2. 1hdc in every hdc to end of row. 

Row 8: Attach MC to the previous row, turn, ch 2. 1hdc in every hdc to end of row. 

Row 9: Attach CC to the previous row, turn, ch 2. 1hdc in every hdc to end of row. 

Row 10: Attach MC to the previous row, turn, ch 2. 1hdc in every hdc to end of row. 

Row 11: Attach CC to the previous row, turn, ch 2. 1hdc in every hdc to end of row. 

Row 12: Attach MC to the previous row, turn, ch 2. 1hdc in every hdc to end of row. 

Row 13: Ch2, 1hdc in every hdc to end of row, Repeat Row 13 until you have 6 rows of MC. 

Finishing Fasten off last stitch, weave in ends.

The Original Pattern can be found at http://www.knitpicks.com/patterns/Cookies_Cream_Crochet_Dishcloth__D55595220.html

Monday, April 16, 2018

Free Pattern of the Week!

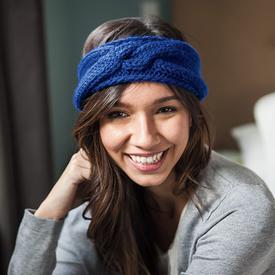
This weeks free pattern is Rosette Headband from KnitPicks.
Rosette Headband
Finished Measurements 21” circumference, 7” wide at widest point
 Needles US 10 (6mm) straight or circular needles,

This is a perfect project to practice your crocheted provisional cast on and grafting skills because of the small number of stitches. Never tried these techniques? This 2 hour headband is a low risk place to start. 

Headband is started with crocheted provisional cast on at center back. A bow-like cable is worked to hit the side of the wearer’s head off center, then the headband is knit to measure 21”. Provisional cast on is then pulled out and headband is grafted together to hide the seam. 

Rosette Stitch Pattern (worked flat over 21 sts) 
Row 1 (RS): Sl 1 Pwise, P3, K6, P1, K6, P4. 
Row 2 (WS): Sl 1 Kwise, K3, P6, K1, P6, K4. 
Repeat Rows 1 and 2 for pattern. 

Provisional Cast On (Crochet Chain Method) 
Using crochet hook and scrap yarn, make a slipknot and chain for 1”. Hold knitting needle in left hand. With yarn in back of the needle, work next chain st by pulling the yarn over the needle and through the chain st. Move yarn under and behind needle, and repeat for the number of sts required. Chain a few more sts off the needle, then break yarn and pull end through last chain. CO sts will be incorrectly mounted; knit into the back of these sts. To unravel (when sts need to be picked up), pull chain end out, and the chain should unravel, leaving live sts. 

Kitchener Stitch (Grafting) 
With an equal number of sts on two needles, hold needles parallel with WS’s facing in and both needles pointing to the right. Perform Step 2 on the first front st, and then Step 4 on the first back st, and then continue with instructions below. 
1: Pull yarn needle Kwise through front st and drop st from knitting needle. 
2: Pull yarn needle Pwise through next front st, leave st on knitting needle. 
3: Pull yarn needle Pwise through first back st and drop st from knitting needle.
4: Pull yarn needle Kwise through next back st, leave st on knitting needle. 
Repeat 1–4 until all sts have been grafted

Directions 
Using crocheted provisional cast on, CO 21 sts. 
Work in Rosette Stitch Pattern until headband measures 7.5”, ending with a WS row. 
Work eight Cable Rows as follows: 
Cable Row 1 (RS): Sl 1 Pwise, P3, Sl 6 sts to CN and hold to front, K6, P1, K6 from CN, P4. 
Cable Rows 2 and all WS Rows: Sl 1 Kwise, K3, P6, K1, P6, K4. 
Cable Rows 3 & 5: Sl 1 Pwise, P3, K6, P1, K6, P4. 
Cable Row 7: Repeat Cable Row 1. 
Cable Row 8: Sl 1 Kwise, K1, P6, K1, P6, K4 

Resume working Rosette Stitch Pattern with RS Row 1; continue in pat until piece measures 20.5” from CO, or .5” shorter than  head measurement. Do not bind off. Cut yarn, leaving a 24” tail. 

Finishing Pull out crocheted provisional cast on and place sts on 2nd needle. With yarn needle, graft ends together. Weave in ends. Block to smooth out cables.

The Original Pattern can be found at http://www.knitpicks.com/patterns/Rosette_Headband__D55671220.html

Monday, April 9, 2018

Free Pattern of the Week!

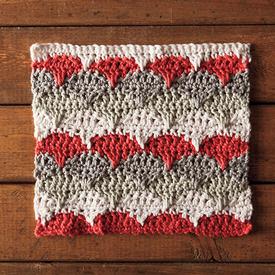
This weeks free pattern is Marguerite Dishcloth from KnitPicks.
Marguerite Crochet Dishcloth
Finished Measurements 9.5” x 8.5”
Hook US J (5mm): crochet hook

Clamshell Spike Stitch 
(Over 3 sl sts) 
Skip 1st sl st, 1 dc into sc under 2nd sl st, 1 dc into the sc of the row below that (3 rows down), 1 dc into sc under 2nd sl st again, skip 3rd sl st. 

Directions 

With Color A, ch 34 Setup rows 

Row 1: Sc in second ch from hook, then sc in each ch to end. Turn. 

Row 2: Ch 1. Sc in the first stitch, and then sc into each st along the row to end. Turn . 

Pattern repeat 

Row 3: Sl st in next 2 st, *hdc into the next st, dc in next 3 sts, hdc in next st, sl st in next 3 sts* rep from * to * to last 2 sts, sl st in last 2 sts. Turn. 

Attach Color B. 

Row 4: ch 3 (counts as dc), 1 dc into the next sl st, *hdc into hdc, sc in next 3 dc, hdc in hdc, work Clamshell Spike Stitch*, rep from * to * to last 2 last 2 sl sts, sc in each sl sts. Turn. 

Row 5: Ch 1, sc across entire row. Turn 

Row 6: Ch 3 (counts as dc). dc in next st, *hdc, sl st over next 3 st, hdc, dc in next 3 st* rep from * to * to last 2 sts, dc in last 2 sts. Turn. 

Attach Color C . 

Row 7: Ch 1, sc in same st, sc in next st *hdc in hdc, work Clamshell Spike Stitch, 1 hdc in hdc, 1 sc in next 3 dc* rep from * to * to last 2 sts, sc in last 2 sts. Turn. 

Row 8: Ch 1, sc across entire row. Turn. 

Row 9 Rep row 3 

Attach Color D 

Rows 10-12 Rep rows 4-6 

Attach Color A

Rows 13-15: Rep rows 7-9 

Repeat rows 3-15 once more, changing colors where indicated. 

Repeat rows 3-5 once more. 

Finishing Fasten off last stitch, weave in ends. Block if desired.


For more information, please see: http://sandra-cherryheart.blogspot.com/ 

The Original Pattern can be found at http://www.knitpicks.com/patterns/Marguerite_Crochet_Dishcloth__D55592220.html

Monday, April 2, 2018

Free Pattern of the Week!

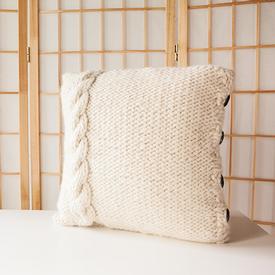
This weeks free pattern is Cable Me Cozy Pillow Cover from KnitPicks.
Cable Me Cozy Pillow Cover
Finished Measurements 16” Square
Needles US 13 (9mm) 32” or longer circular needles

This cozy pillow cover will dress up any room. The superbulky yarn knits up quick, making for a fun project or last-minute gift. The pillow cover is knit up in one piece. Then stitches are picked up on either side for the button band, the buttons are added, and the piece is folded and seamed. 

Right Leaning Cable 
(C3B) Slip 3 sts to CN, hold in back of work: K3, K3 from CN. 

Buttonhole Instructions
 Sl first st to right needle. Move yarn to front of work. Sl next st, psso, repeat twice. (3 sts bound off.) Sl the last st from right needle back to left needle. Turn, bringing yarn to front of work. CO 4 sts. Turn. Sl first stitch. Pass the extra cast on stitch over the next stitch, then slip this stitch back to left needle 

Directions
Pillow Cover Body 
The body of the pillow cover is knit in one piece. 
Loosely CO 66 sts. 
Row 1(WS): K38, P6, K22. 
Row 2 (RS): P22, K6, P38. 
Row 3: Repeat Row 1. 
Row 4: Repeat Row 2. 
Row 5: Repeat Row 1. 
Row 6: P22, C3B, P38. 
Repeat Rows 1-6 eight times then work Row 1, or until pillow cover measures 16.25”, ending with a WS row. BO loosely. 

Button Band 
With right side facing, PU and K 32 sts from left edge of pillow cover. 
Rows 1-5: *P2, K2, rep from * to end of row. 
BO all sts in rib pattern. 

Buttonhole Band 
With right side facing, PU and K 32 sts from left edge of pillow cover. 
Rows 1-2: *K2, P2, rep from * to end of row. 
Row 3: K2, P2, *work buttonhole over next 3 sts, then work 4 sts in rib pattern, rep from * 3 times, work 4th buttonhole, then K2, P2 over remaining 4 sts. 
Rows 4-5: Rep Rows 1-2. 
BO all sts in rib pattern. 

Finishing 
Weave in ends and block. Sew buttons onto button band to correspond with the buttonholes and button the ends together. With right sides facing, fold the pillow cover so that the button band and cable panel match up. Using the scrap yarn and mattress stitch, sew the edges together. Unbutton and flip pillow cover right side out. Insert pillow form and button.


The Original Pattern can be found at http://www.knitpicks.com/patterns/Cable_Me_Cozy_Pillow_Cover__D55718220.html#

Monday, March 26, 2018

Free Pattern of the Week!

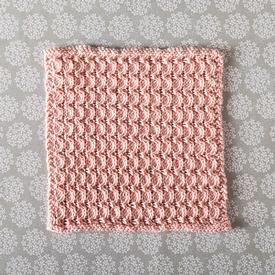
This weeks free pattern is Zig Zag Dishcloth from KnitPicks.
Zig Zag Dishcloth
Finished Measurements 10” Square
Needles US 7 (4.5mm) straight or circular needles


Zig Zag dishcloth is a fun and easy knit. The stitch pattern is easy to memorize, and the twisted stitches create a nubbly texture; wonderful for getting your dishes clean. It can easily be resized to fit your needs. Another option is to knit the cloth in a finer yarn on slightly larger needles to make an elegant face cloth. 

To resize, cast on a multiple of 3+4, and knit to desired length. 

It took exactly 50 grams to make one dishcloth, so if you were to cast on 46 sts (one less repeat of the stitch pattern), you should be able to get two dishcloths out of one ball. 

Crescent Stitch (worked flat) 
Row 1(RS): Knit 
Row 2 and all even rows: K2, purl to last 2 sts, K2 
Row 3: K2, *C3R, repeat from * until last 2 sts, K2 
Row 5: K2, *C3L, repeat from * until last 2 sts, K2 
Row 6: K2, Purl to last 2 sts, K2

Special Stitches 
C3R: Slip 2 sts to a cable needle and hold in back of work, K1, then K2 sts from the cable needle. 
C3L: Slip 1 st to a cable needle and hold in front of work, K2, then K1 from the cable needle. 

Directions 
CO 49 sts, using the Long Tail Cast-on. 
Knit 1 row. 
Work in Crescent Stitch until piece measures approx. 10”, or is square, ending with a Row 5. 
Knit 1 row (WS). BO in knit. 

Finishing Weave in ends, block if desired. 

The Original Pattern can be found at http://www.knitpicks.com/patterns/Zig_Zag_Dishcloth__D55820220.html

Monday, March 19, 2018

Free Pattern of the Week!

This weeks free pattern is The Big Cozy Hat from KnitPicks.
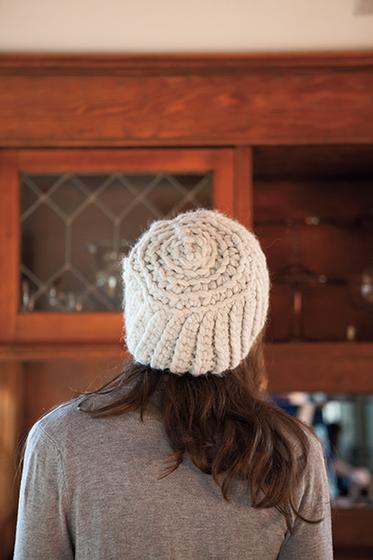
The Big Cozy Hat
FINISHED MEASUREMENTS 19” circumference, stretches to fi t up to a 23” circumference
NEEDLES US 15 (10mm) long circular needle for magic loop or two shorter circs US 17 (12mm) long circular needle for magic loop or two shorter circs

1X1 Rib in the Round All rounds: *K1, P1* rep to end of round 

pcdd Slip 1 stitch with yarn in back, p2tog, then pass slipped stitch over p2tog 

Directions 
Cast on 40 stitches with smaller needles and work the 1x1 Rib in the round for a total of five rounds. 

Change to larger needles and work the body of the hat in the slipped stitch broken rib pattern as follows: 
Round 1: knit 
Round 2: *Sl 1 with yarn in back, P1* to end of round 
Repeat Rounds 1 and 2 a total of four times or until hat measures approx. 4.5” from cast on edge. 

Crown 
Rnd 1: *K7, Pcdd* to end of round (4 times total) 
Rnd 2: *Sl 1 with yarn in back, P1* to end of round
Rnd 3: *K5, pcdd* to end of round (4 times total) 
Rnd 4: *Sl 1 with yarn in back, P1* to end of round Rnd 5: *K3, pcdd* to end of round (4 times total) 
Rnd 6: *Sl 1 with yarn in back, P1* to end of round Rnd 7: *K1, pcdd* to end of round (4 times total) 
Cut yarn leaving a 6-8” tail. 

Finishing With a yarn needle, thread the yarn tail through the remaining sts; tighten to finish. Weave in all ends.

The Original Pattern can be found at http://www.knitpicks.com/patterns/The_Big_Cozy_Hat__D55683220.html#

Monday, March 12, 2018

Free Pattern of the Week!

This weeks free pattern is Supa Fine Cowl from KnitPicks.
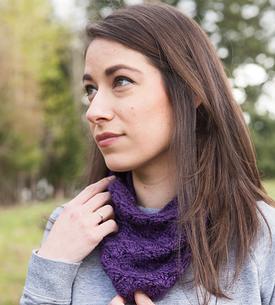
Supa Fine Cowl
Finished Measurements 18” x 9” unstretched and unblocked.
Needles US 8 - 5.0mm 16” circular

You’re one weekend away from a super luxurious knit cowl! This project is perfect for a beginning knitter who wants to practice their knit and purl stitches while catching up on the latest podcast episodes. The Supa Fine Cowl only requires one hank of our Super Fine Alpaca Special Reserve yarn or equivalent yardage of another bulky weight yarn making it perfect for stash busting or gift knitting. 
Directions 
CO 64 sts. 

Ribbing Place marker at the beginning of the round and join being careful to not twist your stitches. 
Row 1 (RS): (K1, P1) repeat to end. 
Row 2 (WS): K to end. 
Repeat rows 1-2 until piece measures 9” from cast on edge, ending after working a row 1. 

Finshing BO loosely, weave in ends and spray block lightly. 

The Original Pattern can be found at http://www.knitpicks.com/patterns/Supa_Fine_Cowl__D55723220.html

Monday, March 5, 2018

Free Pattern of the Week!

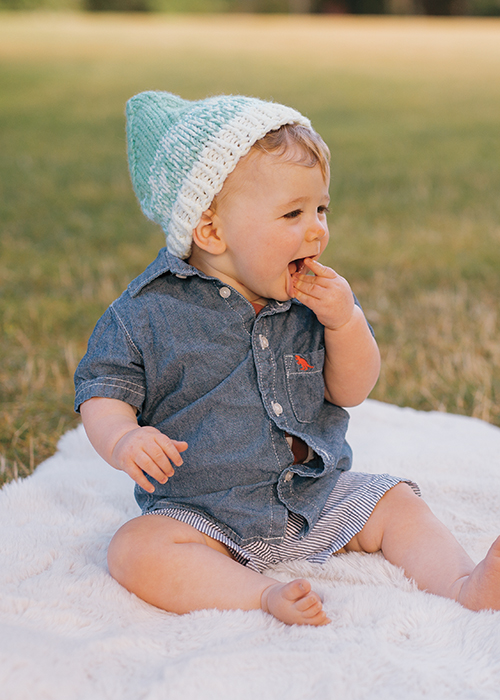
This weeks free pattern is Pixie Hat from KnitPicks.
Pixie Hat
Finished Measurements Babies (toddlers, children), 16 (17, 19)” head circumference
Needles US 11 (8.0mm) 16” circular needles and DPNs

Yarn is held 2 strands together at all times. You decide which is color A and color B 

Directions
With 16” circular and 2 strands of color A, CO 48 (52, 56) stitches. Place a marker and join into a round, being careful not to twist stitches. Work 5 (6, 7) rounds in [k1,p1] rib. (If you want a fold-up cuff, continue in rib for a total of 3 or 4 inches.) Cut one strand of color A, then join remaining A together with one strand of color B. Knit 10 (12, 14) rounds. Cut color A and join another strand of color B. (Color A is finished) Knit one round with 2 strands color B. Pixie shaping: 

Rnd 1: *[K10 (11, 12) k2tog] repeat from * to end of round. 
Rnd 2: Knit 
Rnd 3: *[K9 (10, 11) k2tog] rep from * to end of round. 
Rnd 4: Knit. 
Rnd 5: *[K8 (9, 10) k2tog] rep from * to end. 
Rnd 6: Knit. 
Rnd 7: *[K7 (8, 9) K2tog] rep from * to end. 
Rnd 8: Knit. 
Rnd 9: *[K6 (7, 8) k2tog] rep from * to end. 
Rnd 10: Knit. 
Rnd 11: *[K5 (6, 7) k2tog] rep to end. 
Rnd 12: Knit. 
Rnd 13: *[K4 (5, 6) k2tog] rep to end. 
Rnd 14: Knit. 
Rnd 15: *[K3 (4, 5) k2tog] rep to end. 
Rnd 16: Knit. 
Rnd 17: *[K2 (3, 4) k2tog] rep to end. 
Rnd 18: Knit. 
Rnd 19: *[K1(2, 3) k2tog] rep to end. 
Rnd 20: Knit Jump ahead to round 25 for smallest size. 
Rnd 21: Med and Large sizes: *[K1 (2), k2tog] rep to end. 
Rnd 22: Knit Jump ahead to round 25 for medium size.
Rnd 23: Largest size only: *[K1, k2tog] rep to end. 
Rnd 24: Knit 
Rnd 25: K2tog [4] times. Break yarn, leaving a 10” tail. 

Finishing Thread a tapestry needle and pull yarn through remaining 4 sts. Thread tail through stc once more to secure, tighten, and tuck end through to the inside of the hat. Weave in loose ends.

The Original Pattern can be found at http://www.knitpicks.com/patterns/Pixie_Hat__D55673220.html

Monday, February 26, 2018

Free Pattern of the Week!

This weeks free pattern is InfiniTea Cowl Dishcloth from KnitPicks.
InfiniTea Cowl
Finished Measurements 56.5” circumference x 9.25” high
Needles US 15 (10mm) 40” or 47” circular needle

Basic knitting in the round skills needed. When knitting in the round, knitting every round will produce St st, and knitting one round and purling the next round will produce the Garter st, which is opposite of when you knit flat. 

Stockinette Stitch (St st, worked in the round over any number of sts) All Rounds: K all sts. 

Garter Stitch (worked in the round over any number of sts) Round 1: K all sts. Round 2: P all sts. Rep Rounds 1 and 2 for pattern. 

Directions 
This cowl is done in three sections, using two colors: Color C1, then color C2, then color C1 again. If you prefer, you can complete the cowl with 3 different colors or all one color. 

Section One 
Using C1, CO 120 sts using Long Tail Cast On. 
Carefully join for circular knitting without twisting the sts. 
Place marker at join to mark beginning of round, and begin working in St st: 
Rounds 1-4: Knit. Then work in Garter Stitch: 
Round 5: Knit. 
Round 6: Purl. 
Rounds 7-10: 
Repeat Rounds 5 and 6 twice more. 
Break off yarn. 

Section Two
 Join C2 at stitch marker and work in St st: Rounds 1-10: Knit Break off yarn. 

Section Three Join C1 at stitch marker and work in Garter Stitch: 
Round 1: Knit. 
Round 2: Purl. 
Rounds 3-6: Repeat Rounds 1 and 2 twice more. 
Begin working in St st: Rounds 7 -10: Knit. BO all sts loosely p-wise. 
Break off yarn 

Finishing Weave in ends, wash and block to finished measurements.

The Original Pattern can be found at http://www.knitpicks.com/patterns/InfiniTea_Cowl__D55719220.html

Monday, February 19, 2018

Free Pattern of the Week!

This weeks free pattern is Pima Afghan from KnitPicks.
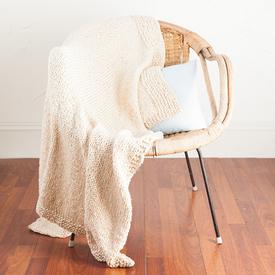
Pima Afghan
FINISHED MEASUREMENTS 49” x 40”
NEEDLES US 11 (8.0mm) 48” circular needle.

This gorgeously soft, drapey afghan knits up quickly at a loose gauge. Two strands of the Pima Cotton Special Reserve yarn are held double throughout giving the blanket a satisfying weight and warmth, perfect for any season. This yarn is also dyeable and machine washable making this blanket infinitely customizable and easy to care for. 

Directions 
CO 102 sts with yarn held double. 
Bottom Border Work 8 rows of garter stitch (K each row). 
Body Row 1 (WS): K4, P to last four stitches, K4. Row2 (RS): K Repeat rows 1-2 until the blanket measures 45” from cast on edge ending with a row 2.

The Original Pattern can be found at 


http://www.knitpicks.com/patterns/Pima_Afghan__D55722220.html

Monday, February 12, 2018

Free Pattern of the Week!

This weeks free pattern is Longitude Hat from KnitPicks.
Finished Measurements 22” circumference x 6” deep
Hooks US Q/19 (15mm)

When working in rounds, work first stitch in same stitch as join. Join means connect last stitch in round to first stitch using a slip stitch. All stitches are worked in the back loop except for the set-up rounds of the brim and top of crown. Stretch is vertical and horizontal, but more horizontal so consider fit preference – snug vs. loose. A 17” fabric may fit up to 20” head circumference.
sc2tog (Single crochet two together) Insert hook in next stitch, yarn over and pull up loop (2 loops on hook), insert hook in next stitch, yarn over and pull up loop (3 loops on hook), yarn over and draw through all 3 loops on hook —1 stitch decreased 

Directions Ch 11. 
Row 1: Working in BLO (bump of chain), SC in the second ch from hook and in each ch across, turn. (10 sc) 
Row 2 (WS): Ch 1, Sl St in BLO of each sc across row, turn. (10 sl st) 
Row 3 (RS): SC in BLO of each sl st across row, turn. (10 sc) 
Rep Rows 2-3 for desired fit. For adult size, work a total of 44 rows for about 22” 
Place RS together, matching up stitches, and with WS facing, sl st through strands that are touching, one from each stitch along. Do not fasten off. Turn work right side out. 

Brim
 Rnd 1: Working along row edges, SC in each row around, join. 
Rnd 2: Ch 1, working in BLO, SC in each sc around, join. 
Fasten off. Weave in ends. 

Top 
Attach yarn to top edge at seam. 
Rnd 1: Working in row edges, *SC in the next 3 sts, SC2tog; rep from * to end of rnd, join. Work in BLO for remaining rounds. 
Rnd 2: Ch 1, SC in the next 2 sc, SC2tog; rep from * around to end of rnd, join. 
Rnd 3: Ch 1, *SC in the next sc, SC2tog; rep from * around to end of rnd, join. 
Rnd 4: Ch 1, (SC2tog) 2 times, SC in the next sc; rep from * around, ending with SC in last 2 sts, join. 
Rnd 5: *SC2tog; rep from * around to end of rnd, join. 
Rnd 6: *SC2tog; rep from * around to end of rnd, join.. Leaving a 24” length of yarn for weaving, fasten off. 
Weave stitches together and use length to fill gaps from decreases 

Finishing Weave in any remaining ends, wash and block..


The Original Pattern can be found at http://www.knitpicks.com/patterns/Longitude_Hat__D55717220.html

Monday, February 5, 2018

Free Pattern of the Week!

This weeks free pattern is Simple Shells Cowl from KnitPicks.
Simple Shells Cowl
Finished Measurements Approximately 10” wide x 22”circumference, blocked.
Hooks US G/7 (4.5 mm)

 This cowl is created as one piece worked in the round. A stitch marker is placed to indicate beg of rnd. 
FSC (Foundation single crochet) Ch 2, insert hook into second ch from hook and pull up a loop, Ch 1, YO and pull through both loops, *insert hook into ch just made, pull up a loop, Ch 1, YO and pull through both loops; rep from * until desired number of single crochet is reached. 

Directions 
Rnd 1: FSC 74, join last st to first st with Sl St, being careful to not twist. 
Rnd 2: Ch 1, SC in same st as join (mark this st), Ch 1, Sk next 2 sc, *5 TR in next sc, Ch 1, Sk next 2 sc, Sc in next sc, Ch 1, Sk next 2 sc; rep from * around to marked st. 
Rnd 3: Work 5 tr in marked st (move st marker to 3rd tr in set), Ch 1, Sk next 2 tr, *SC in next tr, Ch 1, Sk next 2 tr, 5 TR in next sc, Ch 1, Sk next 2 tr; rep from * around to marked st. 
Rnd 4: SC in marked st (mark this st), Ch 1, Sk next 2 tr, *5 TR in next sc, Ch 1, Sk next 2 tr, SC in next tr, Ch 1, Sk next 2 tr; rep from * around to marked st. 
Rep Rnds 3-4 until piece measures approximately 10” or desired width. 
Last Rnd: SC in each sc and tr around, skipping all ch spaces. 

Finishing Weave in ends, wash and block. 


The Original Pattern can be found at http://www.knitpicks.com/patterns/Simple_Shells_Cowl__D55691220.html

Monday, January 29, 2018

Free Pattern of the Week!

This weeks free pattern is Bear with me Dishcloth from KnitPicks.
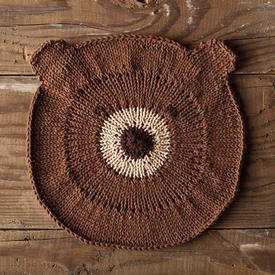
Bear With Me Dishcloth
FINISHED MEASUREMENTS 9.25" diameter
 NEEDLES US 6 (3.5 mm) DPNs and 16” circular needle

This adorable dishcloth uses Elizabeth Zimmermann's Pi shawl ratio to create a flat circle. The ears are knitted flat after binding off the main circle., and the eyes are done using duplicate stitch. 

DIRECTIONS
Using CC2, cast on 8 sts onto DPNs. join into round, being careful not to twist sts. 
Knit 2 rnds. Next rnd: *M1, K1*, rep from * to end of rnd. 
Switch to CC1. Knit 2 rnds. 
Next rnd: *M1, K1*, rep from * to end of rnd. 
Knit 3 rnds. Switch to MC. Knit 1 rnd. 
Next rnd: *K1, M1*, rep from * to end of rnd. 
Knit 8 rnds. 
Next rnd: *K1, M1*, rep from * to end of rnd. 
Knit 9 rnds. 
Bind off 26 sts. Cut yarn. Put next 9 sts on holder or scrap yarn. Reattach yarn, and bind off next 20 sts. Cut yarn, and put next 9 sts on holder or scrap yarn. Reattach yarn and BO rest of sts. 

Ears
Put 9 sts from holder on needles. 
Row 1: Knit. 
Row 2: Purl. 
Row 3: Knit. 
Row 4: Purl. 
Row 5: BO 1 st, k7, BO 1 st. 
Row 6: BO 1 st pwise, p5, BO 1 st pwise. Row 7: BO all sts kwise. 

Finishing
 Weave in ends. Using duplicate stitch, create eyes over a square of four sts. Best placement for the eye stitches is to make the inside eye sts roughly even with the outside edges of the CC1 circle and about two stitches above it. See photo for guide.


The Original Pattern can be found at
http://www.knitpicks.com/patterns/Bear_With_Me_Dishcloth__D55585220.html

Monday, December 25, 2017

Free Patterns of the Week!

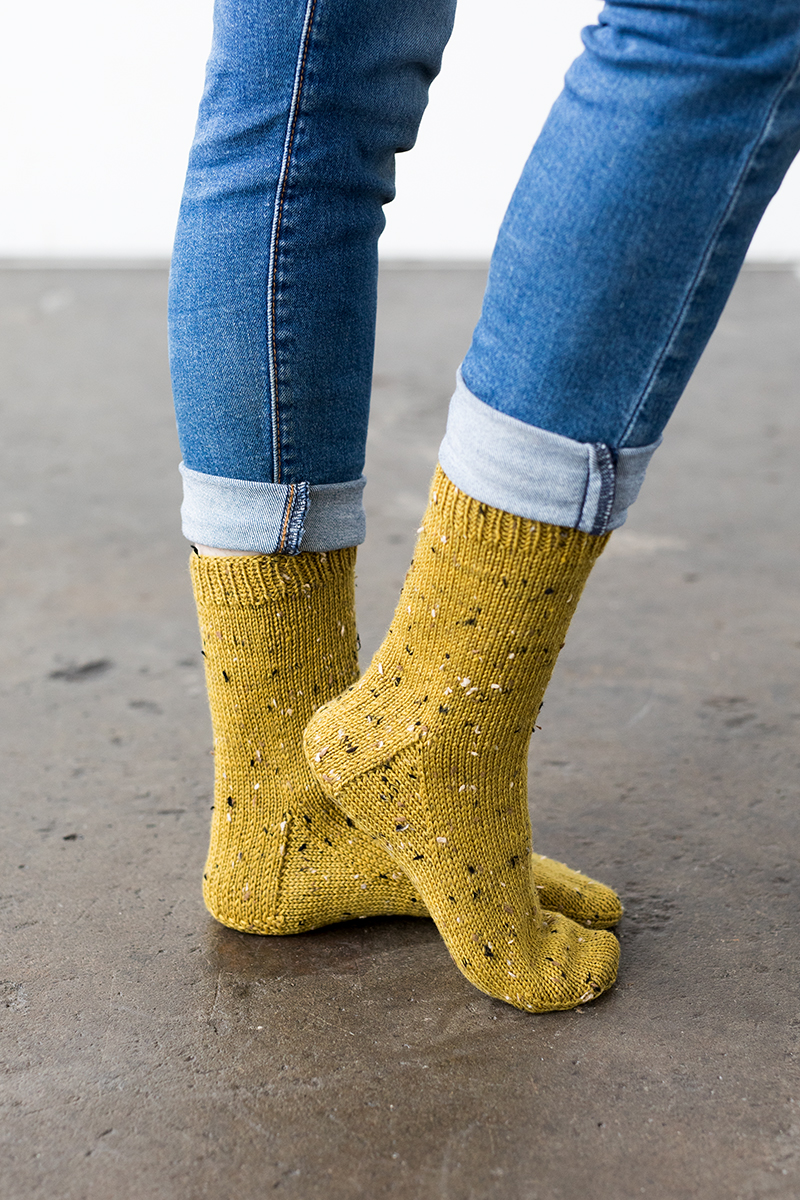
This weeks free patterns are Socks from KnitPicks. Everyone loves warmth, so make those you love something warm for their feet!

Top Down Socks

Notes: This is a simple top down sock, perfect for those wanting to practice their sock making skills. This pattern is easily adaptable for DPNs, Magic Loop or 2 circulars so you can use your favorite knitting method. For the perfect fit, measure around the widest part of your foot for the circumference and choose the size slightly smaller than your measurement (for instance, if your foot is 7.5” around, knit the 7” size). Then measure the bottom of your foot, from heel to longest toe to determine the foot length.

This pattern was written with a 5.5” leg length -but you can make it shorter or longer; however if you do the latter you may need an additional skein of yarn.

For a tutorial on the Long Tail Cast On, please see http://tutorials.knitpicks.com/wptutorials/long-tail-cast-on/

Kitchener Stitch
Hold the two pieces of knitting parallel to one another with the wrong sides facing. Thread the working yarn with a yarn needle.

*Insert the yarn needle knitwise into the first stitch on the front knitting needle. Draw through the stitch and slip the stitch off  of the front needle. Insert the yarn needle purlwise into the next stitch on the front knitting needle. Draw through the stitch. Leave the stitch on the needle. Insert the yarn needle purlwise into the first stitch on the back knitting needle. Draw through the stitch and slip the stitch off of the back needle. Insert the yarn needle knitwise into the next stitch on the back knitting needle. Draw through the stitch. Leave the stitch on the needle. Repeat these steps beginning at the * until all of your stitches have been grafted together.

Directions
Leg
CO 44 (48, 56, 60, 64) using Long Tail Cast On or other CO method. 22 (24, 28, 30, 32) sts will be for instep, 22 (24, 28, 30, 32) will be for the heel. Divide over your needles; for DPNs, it is easiest is to have your heel sts on one DPN and instep sts divided evenly between 2 DPNs - 11 (12, 14, 15, 16) sts on each instep DPN. If you prefer using 5 DPNs, divide both heel & instep sts evenly over the 4 needles but be sure remember which sts are your heel and instep. For 2 circulars or Magic Loop Method, each side will have 22 (24, 28, 30, 32) st. For all methods, PM to indicate heel st and join to knit in the round, making sure not to twist sts.

Next Rnd: *K1, P1* rep between ** to end of round.

Rep rnd for 1”.

Next Rnd: K all sts.

Rep rnd until leg is 5.5” long.


Heel Flap
You will be working back & forth on only the 22 (24, 28, 30, 32) heel sts for this section.
Row 1 (RS): Sl1, K to end.
Row 2 (WS): *Sl1, p1* rep to end,
Rep rows 1-2 an additional 10 (11, 13, 14, 15) times, 11 (12, 14, 15, 16) sl sts on each side of heel flap.
Turn the Heel
Row 1 (RS): Sl1 K 12 (13, 15, 16, 17), ssk, k1 turn (there will be a gap after the k1). 1 st dec.
Row 2 (WS): Sl1, p5, p2tog, p1 turn (there will be a gap after the p1). 1 st dec.
Row 3: Sl1, k to 1 st before the gap, ssk (1 st from each side of the gap), k1 turn. 1 st dec.
Row 4: Sl1, p to 1 st before the gap p2tog (1 st from each side of the gap), p1, turn. 1 st dec.
Repeat rows 3-4 until all sts have been worked.

Gusset
You will now begin to work in the round again. If using 4 DPNs, you may want to now put all instep stitches on one needle and divide the heel stitches between 2 needles.

Next Rnd: K across heel sts, then PU and k 11 (12, 14, 15, 16) sl sts along heel flap, PU & k 2 sts at top of gusset, k 22 (24, 28, 30, 32) across instep stitches, PU & k 2 sts at top of gusset, PU & k 11 (12, 14, 15, 16) along heel flap.

K across remaining heel sts, then k across instep. You are now at the start of the heel sts, pm to mark beginning of round.
Rnd 1: K1, SSK, k to last 3 sts of heel k2tog, k1, k across instep sts. 2 heel sts dec.
Rnd 2:: K all sts
Rep rnds 1-2 until you have 22 (24, 28, 30, 32) on the heel sts, 44 (48, 56, 60, 64) total.


Foot
Work in St st until total length is 2 (2, 2.5, 2.5, 2.5)” less than the total foot length, measuring from the back of the heel to the live sts.

Toe
Rnd 1: *K1, ssk, k to last 3 heel sts, k2tog, k1* rep between ** over instep sts. 4 sts dec.
Rnd 2: k all sts.
Rep rnds 1-2 8 (8, 10, 10, 10) more times until 4 (6, 6, 8, 10) sts remain for heel and 4 (6, 6, 8, 10) for instep - 8 (12, 12. 16. 20) sts total. Break yarn, leaving an 12” tail. If using DPNs, place instep stitches on one needle and heel stitches on one needle. Graft instep and heel sts together using Kitchener Stitch.

Finishing
Weave in ends and block to measurements.


The Original Patterns can be found at http://www.knitpicks.com/cfPatterns/Pattern_List_Filtered.cfm?PROJECT-TYPE=30025218&FREE-PAID=Free&showAll=yes

Monday, December 18, 2017

Free Patterns of the Week!

This weeks free patterns are Socks from KnitPicks. Everyone loves warmth, so make those you love something warm for their feet!

Go your own way socks - Toe Up Socks


Finished Measurements
6 (7, 8, 8.5 9)” foot circumference, customizable foot length and 5.5” leg length

Needles
US 2 (2.75mm): DPNs or (2) circular needles for two circular needles technique or 1 long circular needle for Magic Loop or size to optain gauge

Notions
Yarn Needle
Stitch Markers

Gauge
28 sts and 40 rows = 4” in stockinette stitch in the round, blocked.


Toe Up Socks
Notes: This is a simple toe up sock, perfect for those wanting to practice their sock making skills. This pattern is easily adaptable for DPNs, Magic Loops or 2 circulars so you can use your favorite knitting method. For the perfect fit, measure around the widest part of your foot for the circumference and choose the size slightly smaller than your measurement (for instance, if your foot is 7.5” around, knit the 7” size). Then measure the bottom of your foot, from heel to longest toe to determine the foot length. This pattern was written with a 5.5” leg length -but you can make it shorter or longer; however if you do the latter you may need an additional skein of yarn.

For a tutorial on Judy’s Magic Cast On, please see: http://tutorials.knitpicks.com/wptutorials/judys-magic-cast-on/.

Wrap and Turn (w&t):
Work until the stitch to be wrapped. If knitting: bring yarn to the front of the work, slip next st as if to purl, return the yarn to the back; turn work and slip wrapped st onto RH needle. Continue across row. If purling: bring yarn to the back of the work, slip next st as if to purl, return the yarn to the front; turn work and slip wrapped st onto RH needle. Continue across row.

Picking up wraps
Work to the wrapped st. If knitting, insert the RH needle under the wrap(s), then through the wrapped st K-wise. Knit the wrap(s) together with the wrapped st. If purling, slip the wrapped st P-wise onto the RH needle, and use the LH needle to lift the wrap(s) and place them on the RH needle. Slip wrap(s) and 
unworked st back to LH needle; purl all together through the back loop.

Stretchy Bind-off
K2, *insert the left needle into the front of the 2 sts on the right needle and knit them together - 1 st remains on right needle. K1*, rep between ** until all sts have been bound off.

Directions
Toe
Using Judy’s Magic Cast On, CO 4 (6, 6, 8, 10) sts for the instep and 4 (6, 6 8, 10) sts for the heel. K one round, dividing st between needles. For DPNs, it is easiest to have your heel sts on one DPN and instep sts divided evenly divided between 2 DPNs - 2 (3, 3, 4, 5) sts on each DPN. If you prefer using 5 DPNs, divide both heel & instep sts evenly between the 4 worrking needles, but be sure to remember which sts are your heel and instep. For 2 circulars or Magic Loop Method, each side will have 4 (6, 6, 8, 10) st. For all methods, PM to indicate heel sts and beg of round.

Rnd 2: *Kfb in the first st, k to 2 sts before the end of the heel sts, kfb, k1*; rep across instep sts. 4 sts inc.

Rnd 3: K all sts

Rep rnds 2-3 an additional 8 (8, 10, 10, 10) times. 44 (48, 56, 60, 64) sts total, 22 (24, 28, 30, 32) st for the heel and 22 (24. 28, 30, 32) sts for the instep.

Foot
Work in St st until total length is 3.5 (4, 4.75, 5, 5.25)” less than the total foot length.

Gusset
Increases will only be on the heel sts, instep will be in St st. 

Rnd 1: Kfb in the first st, k to 2 sts before end of the heel sts, kfb, K1, k across instep sts to end of round. 2 heel sts inc.
Rnd 2: k all sts
Rep rnds 1-2 an additional 9 (10, 12, 13, 14) times, then work rnd 1 once more. 66 (72, 84, 90, 96) sts total, 44 (48, 56, 60, 64) st for the heel and 22 (24, 28, 30, 32) for the instep.

Heel
You will be working back & forth on only the heel sts for this section.
Row 1 (RS): K 32 (35, 41, 44, 47) w&t
Row 2 (WS): P 20 (22, 26, 28, 30) w&t
Row 3: K to st before wrapped st, w&t
Row 4: P to st before wrapped st, w&t
Repeat rows 3-4 until 7 (8, 9, 10, 10) sts are wrapped on either side of the 8 (8, 10, 10, 12) center unwrapped sts. RS should be facing after working a row 4.

You will work 1 round over both heel & instep sts as follows:
Next Rnd: K to end of heel sts, picking up wraps as you come to them, then k across instep sts. You should now be at the beginning of the heel sts.

Heel Flap
You will be working back & forth on only the heel sts for this section.
Row 1 (RS): K 32 (35, 41, 44, 45) sts, picking up remaining wraps, SSK, turn. 1 st dec.
Row 2 (WS): *Sl1, p1* rep between ** 10 (11, 13, 14, 15) times, Sl1, p2tog, turn. 1 st dec.
Row 3: Sl1, k20 (22, 26, 28, 30), ssk, turn. 1 st dec.
Row 4: *Sl1, p1* rep between ** 10 (11, 13, 14, 15) times, sl1, p2tog, turn. 1 st dec.
Rep rows 3-4 an additional 8 (9, 11, 12, 13) times, then work row 3 once more but do not turn at end. You will now begin to work in the round again. K across instep sts to beg of heel sts.
Next Rnd: K2tog, k all sts to end. 44 (48, 56, 60, 64) sts.
Leg
Next Rnd: K all sts
Rep this round until leg is 4.5” from the top of the heel flap or to 1” less than desired finished length.
Next rnd: *K1, P1* rep between ** to end of round.
Rep rnd for 1”, then BO using Stretchy Bind-Off.
Finishing
Weave in ends and block to measurements.


The Original Patterns can be found at http://www.knitpicks.com/cfPatterns/Pattern_List_Filtered.cfm?PROJECT-TYPE=30025218&FREE-PAID=Free&showAll=yes

Monday, December 11, 2017

Free Pattern of the Week!

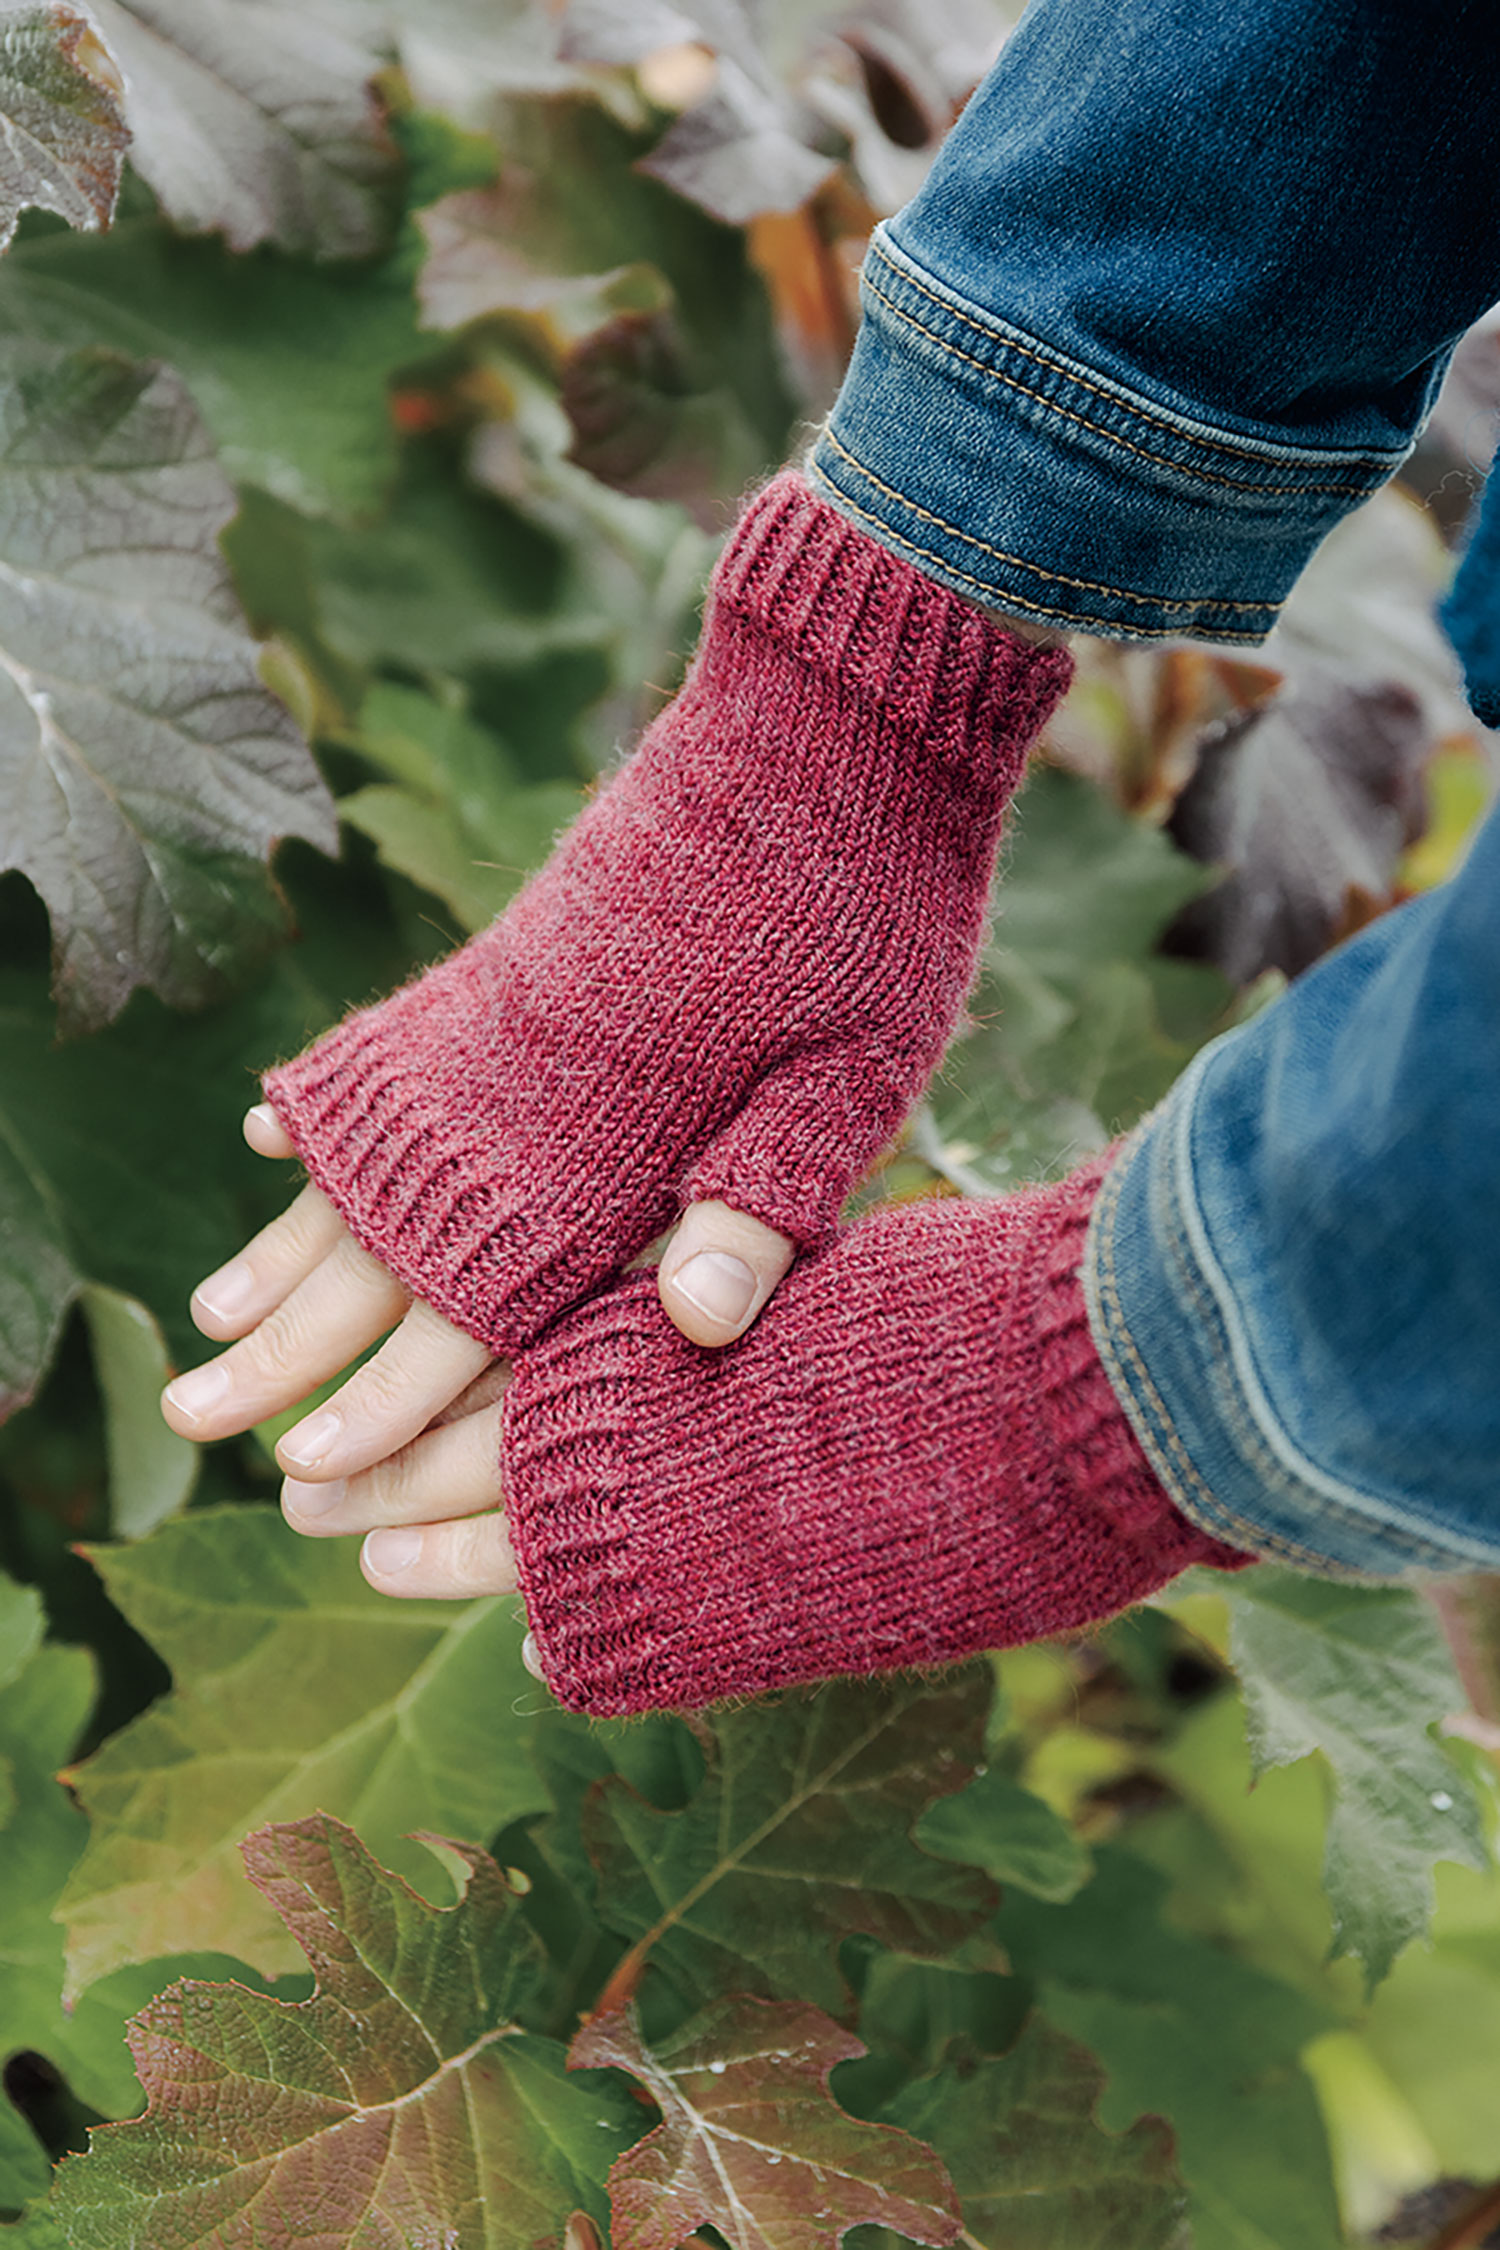
This weeks free pattern is Semplice Fingerless Mitts from KnitPicks.
Semplice Fingerless Mitts
Finished Measurements 6” (7”, 8”) palm circumference
Needles US 3 (3.5 mm) DPNs or 40” or longer circulars for Magic Loop

Twisted Rib Pattern *K1tbl, p1 repeat from * for pattern 

Directions CO 36 (42, 48) stitches, pm for beginning of the round, and join to work in the round, taking care not to twist stitches 
Work for 1” in Twisted Rib Pattern 
Work 2” (2.5” 3”) in st st 

Begin increases for thumb 
Set up round: K1, pm k to 1 stitch before the end of the round, pm K1 

Round 1: Knit to 1 stitch before 1st marker, Kf&b, sm, k to next marker, sm, Kf&b, k to end of round. 2 stitches increased. 

Round 2: k all stitches 

Repeat these 2 rounds 4 (5, 6) more times.

Set thumb aside 
K to second marker, remove marker, K 1, sl next 5 (6, 7) stitches to holder or waste yarn. 

Remove start of round marker. Sl first 5 (6,7) stitches of the next round to holder or waste yarn. 

Place marker for new beginning of the round and join to work in the round. 

Work 1” (1.5”, 2”) in st st or until 1” below desired length Work 1” in Twisted Rib pattern BO loosely. 

This can be achieved by BO with a larger needle, or using a stretchy bind off such as the one below: K2, *insert the left needle into the front of the 2 sts on the right needle and knit them together--1 st remains on right needle. K1, repeat from * until all sts have been bound off. 

Fasten off last stitch. 

Thumb Join yarn and PU & knit 10 (12, 14) thumb stitches from waste yarn, then PU & knit 4 st from join at side of hand. 

PM and join to work in the round Next round: k to last 4 stitches, k2tog, k2tog. 

12 (14, 16) st total. Work .5” (.75” 1”) in st st or to .25” below desired length K 3 rounds in Twisted Rib pattern BO loosely 


Finishing: Weave in all ends and make second mitt exactly like the first.


The Original Pattern can be found at http://www.knitpicks.com/patterns/Semplice_Fingerless_Mitts__D55478220.html

Monday, December 4, 2017

Free Pattern of the Week!

This weeks free pattern is Dwell House from KnitPicks.
Dwell House Pattern
Finished Measurements 3” tall, 3” long, 2” wide
Needles US 1 (2.25 mm) DPNs or 40” or longer circulars for Magic Loop

A quick note about foam blocks - simple florist foam is delicate and easily crushes and fl akes. If you want to avoid this, there are more solid and sturdy blocks that can be used for this purpose. 

DIRECTIONS 

Foam House 
Begin by cutting the house shape from the foam block. Use a pair of scissors to slice a piece of foam off one block that measures 3” high x 3” long x 2” wide. Then, use scissors to shave off the excess foam at the top to form a peaked roof. To do this, measure 1” from the top of the block and scored a shallow line at 1” along both long sides. Find the center at the top of the block and make a shallow mark there as well; this will be the “peak” of the cottage roof. The center mark and side scores mark the three points of the triangle. Using the scissors, place the tip of the blade at the mark that was made at the “peak” of the house and angle the blade so that it intersected with the score marked earlier. Press down while maintaining the angle until the scissors completely cut through the foam block. Repeat on the remaining side. Measure the sides of the house and clean up the edges, making sure your walls and the roof are straight and even. 

Cottage Base
 CO 60 sts with CC1. 
Arrange the stitches between four double pointed needles as follows: needles 1&3 have 18 sts each and needles 2&4 have 12 sts each. 
Join to work in the round. 
Work 4 rounds garter stitch followed by stockinette stitch until piece measures 2” from the cast-on edge. 

Gables
Needle 4 (12 sts) will be your fi rst gable. At the end of needle 4 instead of continuing to knit in the round, turn work and work one purl row across needle 4. 
Row 1: Turn work, ssk, knit across needle 4 until last two stitches, k2tog. 
Row 2:Turn, purl one row.
Repeat rows 1 & 2 until two stitches remain, k2tog, break yarn, leaving a 4 inch tail and draw through remaining stitch. 

Needle 2 (12 sts) will be your second gable. Join yarn to the wrong side of needle 2 and work one purl row across needle 2. 
Row 1:Turn work ssk, knit across needle 4 until last two stitches, k2tog. 
Row 2: Turn, purl one row. 
Repeat rows 1 & 2 until two stitches remain, k2tog, break yarn, leaving a 4 inch tail and draw through the remaining stitch. 

Roof 
Using CC2, join yarn to the right side of needle 3. 
Work garter stitch for 1.5 “. 
Leave the stitches on the needle for now and break yarn, leaving a 4 inch tail. Using CC2, join yarn to the right side of needle 1. 
Work garter stitch for 1.5 “. 
End with a right side row. 
Hold Needle 3 and Needle 1 together and bind off stitches on both needles using the Three Needle Bind off method. Use the tails to stitch the Gables to roof edges. 

Door
Use the scissors to round off one narrow side of the dark piece of felt to create a rounded door. Sew to front of cottage with dark thread. Cut two windows from the piece of off-white felt and sew to one wall of the cottage using light thread. Gently ease the knit shell over the foam base until the shell completely covers the foam. Ta dah! One cozy dwelling. 


The Original Pattern can be found at http://www.knitpicks.com/patterns/Dwell_House_Pattern__D51028220.html

Monday, November 27, 2017

Free Pattern of the Week!

This weeks free pattern is Snowman Draft Stopper from KnitPicks.
Snowman Draft Stopper
Finished Measurements Approximately 36” long x 6” circumference, depending on amount of filling.
Needles US 5 (3.75mm) DPNs

This tall, thin snowman will keep the cold air out and the holiday fun in. The top hat, scarf, face, and body are knitted stripes. The eyes, mouth, nose, and buttons are embroidered. After embroidering, sew one end closed, fill with lentils and sew the other end closed. 

Sized to lay the length of the average exterior door, you can easily make it shorter for an interior door or windowsill. 

To facilitate embroidery, roll the top down like you would a tube sock. 

Seed Stitch Pattern (in the round over an odd number of sts) 
Round 1: *K1, P1; rep from * to end of rnd. 
Round 2: *P1, K1; rep from * to end of rnd. 
Repeat these 2 rnds for pattern. 

Stockinette Stitch (in the round) All Rounds: K all stitches . 

Directions 
With C1, CO 39 sts, leaving a long tail to sew the end closed. Arrange 13 sts on each of 3 needles. Place marker and join for working in the rnd, being careful not to twist the line of sts. Work 3” of St st. Then work 1” in Seed st. Break C1. (Top hat complete.) 

Join MC and work 3” of St st. Break MC. (Face complete.) 

Join C2 and K 1 rnd. Then work 1” in Seed st. Break C2. (Scarf complete.) Join MC and work body in St st until piece measures 33” from beg, or 2–3” short of desired length. (Lentils will weigh down and lengthen the snowman.) Work 1” in Seed st. 

BO all sts, decreasing 1 st so that you have an even number of sts (38) to sew closed, and leaving a long tail. 

Finishing 
Using C1 and C2, embroider the face and buttons using the photo as a guide—or use your creativity to make your own face. Secure ends and weave in, if desired. 

Fold the tube in half, making sure to orient the face on one side, and sew one end closed; weave in end. Working a little at a time, fill the snowman with lentils, stopping 2–3” before it’s completely full. (A measuring cup with a pour spout is helpful for this.) Lay the snowman out and adjust the filling as necessary. Sew the other end closed using the same halves as the first end. Weave in end.

The Original Pattern can be found at http://www.knitpicks.com/patterns/Snowman_Draft_Stopper__D55678220.html

Monday, November 20, 2017

Free Pattern of the Week!

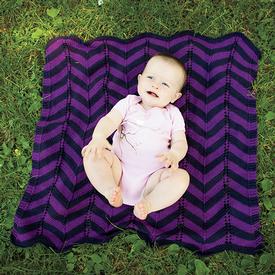
This weeks free pattern is Chevron Cherub Wrap from KnitPicks.
Chevron Cherub Wrap
Finished Measurements 32” wide x 29” long
Needles US 5 (3.75mm) 24” circular needles,

Alternating colors on eyelet-laced chevron rows surrounded by a garter stitch border are created using stockinette stitch, yarn overs, and the central double decrease for skill building. Knit in monochromatic shades or contrasting colors, the stitch pattern is easily memorized while providing interest for the knitter. 

Central Double Decrease (CDD) 
Slip 2 sts together Kwise, knit the next stitch, then pass the 2 slipped sts over. 2 sts dec. 

Body Stitch Pattern (worked flat) 
Row 1: K5, SSK, *K13, YO, K1, YO, K13, CDD*, repeat from * to * 4 times, K13, YO, K1, YO, K13, K2tog, K5. 
Row 2: K5, P all sts until 5 sts remain, K5. 
Repeat rows 1 and 2 for pattern. 

Directions
Loosely CO 161 sts using MC.
K 6 rows in garter stitch. 
Switch to CC and work rows 1 and 2 of Body Stitch Pattern for 6 rows. 
Switch to MC and work rows 1 and 2 of Body Stitch Pattern for 6 rows. 
Continue knitting in pattern as established, switching between MC and CC every 6 rows until blanket measures approximately 28” ending with CC. 
Switch to MC and K 6 rows in garter stitch. 
Loosely bind off Kwise, cut yarn. 

Finishing Weave in ends, wash, and block if desired. 


The Original Pattern can be found at http://www.knitpicks.com/patterns/Chevron_Cherub_Wrap__D55655220.html

Monday, November 13, 2017

Free Pattern of the Week!

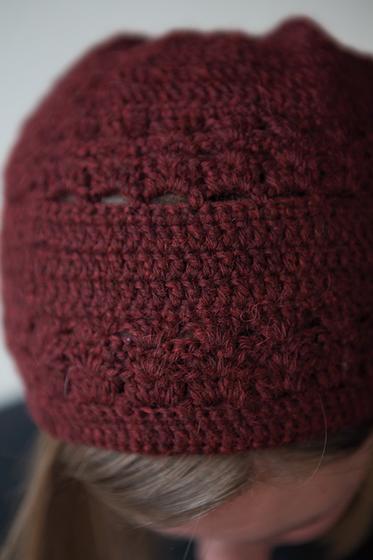
This weeks free pattern is Hyde Park Hat from KnitPicks.

Finished Measurements 20.5 (22, 23.5)” finished brim circumference; hat is meant to be worn with 1” of negative ease. Depth is 8” for non-slouch version and 10.5” for slouch version.
Hooks US F/5 (3.75mm) for brim, US G/6 (4.00mm) for body

Directions for smaller size are shown first, followed by medium and large in parenthesis where different. The brim is crocheted first then the rest of the hat is crocheted upward to the crown; the brim is folded under and elastic may be added for a snug fit. Work a shorter depth for the non-slouch version or deeper for the slouch version. 

SC INC (single crochet increase) Work 2 SC into same st. 

DC DEC (double crochet decrease) Worked over 2 sts, YO, insert hook into 1st st, YO and pull up a loop, YO and pull through 2 loops on hook, YO, insert hook in 2nd st, YO and pull up a loop, YO and pull through 2 loops on hook, YO and pull through all 3 loops on hook. 

4 DC-Shell Work 4 DC all in the same st. 

3 DC-Cluster 3 DC all worked in same st: (YO, insert hook in space, YO and pull up a loop, YO and pull through 2 loops) 3 times, YO and pull through all 4 loops on hook. 

Directions 
Brim With smaller hook, Ch 110 (118, 126), or a multiple of 4 + 2 sts to fit around your head. 

Row 1: SC in 2nd ch from hook and in each ch to end. (109 [117, 125] sc). Measure to ensure the chain fits desired head circumference 

Row 2 (RS): Ch 3 (counts as 1st dc, now and throughout), turn. DC in 2nd sc and in each sc across row. Count your sts and write down the count so you can keep track. Join with a Sl St to 3rd ch of starting ch-3, being careful not to twist work. The rest of the hat is worked in rounds. Join the end of each row with a Sl St to the start stitch of the row, then turning to work back. 

Row 3 (WS): Ch 1, turn. SC in 1st dc and in each dc across row. Join with a sl st to 1st sc of row (count your sts!). Place marker after Row 3 to indicate fold line for brim. 

Row 4 (RS): Rep Row 2. Count your stitches! If you do not happen to have a multiple of 4 + 1 sts, in the next row work as many SC INC as needed (evenly spaced around row) to force a multiple of 4 + 1 sts. 

Row 5 (WS): Rep Row 3 (SC INC as necessary to force a multiple of 4 + 1 sts). Join with Sl St to 1st sc of row. 

Body 
Change to larger hook for the rest of the hat. 

Row 6 (RS): Ch 1, turn. SC in 1st sc, *Ch 4, Sk 3 sc, SC in next sc; rep from * across to end of row, join with Sl St to 1st sc. (27 [29, 31] ch-4 sp). 

Row 7 (RS): Ch 3, do not turn. Work 4 DC-Shell in 1st ch-4 sp, *work 4 DC-Shell in next ch-4 sp; rep from * around, join with Sl St to 3rd ch of starting ch-3. (27 [29, 31] Shells). 

Row 8 (WS): Ch 3, turn, Work 4 DC-Shell between 2nd and 3rd dc of 1st 4 dc-Shell, * work 4 DC-Shell between 2nd and 3rd dc of next 4 dc-Shell; rep from * around, join with Sl St to 3rd ch of starting ch-3. 

Row 9 (RS): Rep Row 8. 

Row 10 (WS): Ch 1, turn. SC in each dc around to tch, SC in 3rd ch of tch, join with Sl St to starting sc. (Mult of 4 + 1 sc, count them!) 

Row 11 (RS): Ch 3, turn. SC in 2nd sc and in each sc across, join with Sl St to 3rd ch of starting ch-3. (Mult 4 + 1 dc). 

Row 12 (RS): Ch 3, do not turn. Continue working with RS facing, DC in 2nd dc and in each dc around, join with Sl St to 3rd ch of starting ch-3. (Count and make sure you still have a mult of 4 + 1 dc). 

Row 13 (RS): Rep Row 12. 

Row 14 (WS): Ch 1, turn. SC in 1st dc and in each dc around to tch, SC in 3rd ch of tch, join with Sl St to starting sc. (Mult 4 + 1 sc). 

For Non-Slouch Version only, work Rows 15-20 below: Rows 15-20: Repeat Rows 6-11 once, and then go to Crown Decreasing Section. The hat should be about 5.5” deep. The crown will add an additional 2.5”. 

For Slouch Version only, work Rows 15-29 below: Rows 15-29: Repeat Rows 6-14 once, then Rows 6-11 once more. Go to Crown Decreasing Section. The hat should be about 8” deep. The crown will add an additional 2.5”. 

Crown Decreasing 
Next Row (RS): Ch 3, do not turn. *DC DEC over the next 2 dc, DC in each of the next 2 dc; rep from * around, join with Sl St to 3rd ch of starting ch-3. (82 [88, 94] dc. You have decreased approximately ¼ of your sts). 

Next Row (RS): Rep Row 12. 

Next Row (WS): Rep Row 14. 

Next Row (RS): Ch 1, turn. SC in 1st sc, *Ch 2, Sk 2 sc, SC in next sc; rep from * to end of row, join with Sl St to 1st sc. (27 [29, 31] ch-2 sp).

Next Row (RS): Ch 3, do not turn. 3 DC-Cluster in 1st ch-sp, Ch 1, *3 DC-Cluster in next ch sp, Ch 1; rep from * around, join with Sl St to 3rd ch of starting ch-3. (27 [29, 31] Clusters). 

Next Row (RS): Ch 3, do not turn. DC in top of 1st 3 DC-Cluster, *DC in top of next 3Dc-Cluster; rep from *, join with Sl St to 3rd ch of starting ch-3. (28 [30, 32] dc). 

Next Row (RS): Ch 3, do not turn. *DC DEC over next 2 dc; rep from * to end of round, DC in rem st. Join with Sl St to 3rd ch of starting ch-3. (15 [16, 17] st).

Next Row (RS): Ch 3, do not turn. *DC DEC over next 2 dc; rep from * to end of round, DC in rem dc for size Md, join with Sl St to 3rd ch of starting ch-3. (8 [9, 9] st). 

Cut yarn, leaving an 8” tail. Fasten off. Use a yarn needle to slip through top of all of the sts in last row; pull tight to close. 

Finishing Brim First sew the ends of Rows 1 and 2 closed using either yarn or sewing thread. Try on hat to decide if you will be adding elastic to the brim. The elastic will keep the brim from stretching out after use, so I suggest it unless you prefer a loose fitting brim. 

If using elastic, cut a piece about ¾” longer than desired length, then sew ends together, overlapping the extra ¾”. Turn hat inside out; fold up on marked fold line at the Row 3 of Brim. If using elastic, insert into fold. Using yarn or sewing thread on wrong side of hat, stitch unused loops of starting chain to Row 5 of Brim.  

Remove marker. Weave in ends. Lightly steam block hat to increase floppiness. Enjoy!

The Original Pattern can be found at
http://www.knitpicks.com/patterns/Hyde_Park_Hat__D55699220.html