Thursday, December 29, 2016

Water Bottle and Reservoir Care

Water Bottle and Reservoir Care


Being an Outdoor Guide means that everyone asks you how to fix their stuff. Here are some tips and tricks that you can use!

Over time, reusable plastic water bottles occasionally develop unpleasant odors and/or tastes. This typically occurs when bottles are stored incorrectly or cleaned infrequently.
Most rigid water bottles are made out of either polyethylene plastic (which tends to be cloudy in appearance) polypropylene (which comes in medium to dark colors) or copolyester (which can be clear, frosted or colored). Most hydration system reservoirs have polyethylene linings, which retain tastes and odors more easily than polycarbonate. But all plastic bottles can develop unwanted tastes or odors if cared for incorrectly.

General Care

The best way to maintain any plastic water bottle or bladder bag is to rinse it out after each use and to let it air dry completely. Most odor and taste problems occur when bottles are stored in wet areas or kept sealed for long periods of time with liquid inside. Polyethylene bottles can also develop unpleasant tastes/odors when they're used to store a variety of acidic juices.

Cleaning

If your water bottle develops a funky taste or odor, try the following procedure:
  • Put a teaspoon of bleach and a teaspoon of baking soda in the bottle and fill it with water.
  • Let the bottle sit overnight.
  • Rinse out the bottle completely the next day (or run it through the dishwasher).
  • Let the bottle air dry completely.
When cleaning hydration reservoirs, rinse them thoroughly and let them completely air dry before using them again. Do not place in your dishwasher.

Tip: Some tastes and odors can be removed from plastic water bottles simply by rinsing them with anti-bacterial mouthwash.

Article and others like it found at REI.com

Monday, December 26, 2016

Free Pattern of the Week

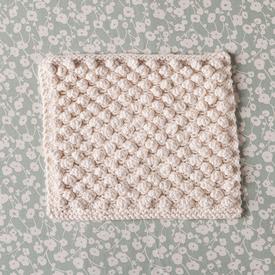
This week's free pattern is a Snowbobbles Dishcloth from Kintpicks.com


Snowbobbles Dishcloth

Finished Measurements - 8” long x 8” wide.
Needles - US 6 (4mm) straight or circular needles, or size to obtain gauge
Notions - Yarn Needle
Gauge - 19 sts and 21 rows = 4” in garter stitch.

Notes:
The Snowbobbles Dishcloth pattern uses a 5-stitch garter bobble to create an knobbily bobble that alternates to create a nestled bobble textured fabric that makes a great scrubby surface.

Make Bobble (MB)
Into the stitch where the bobble will be, k1*yo,k1* 2 times. There will now be five sts where there was one. Turn. Knit 5 sts. Turn. K2tog, place stitch just worked back onto left hand needle, pass
the remaining 3 sts over the st just worked, one at a time. K1.

Directions

Top Border
CO 39 sts
Work 3 rows in garter stitch

Begin Bobble Repeat
Row 1: K3 sts *MB, k3* until 4 sts rem, MB,k3.
Row 2: Knit all sts.
Row 3: K5 sts, *MB, k3* until 2 sts rem, k2.
Row 4: Knit all sts.
Repeat these last 4 rows until the piece measures 7.25 inches
from the cast on row.

Bottom Border
Work 3 rows in garter stitch.
BO all stitches.

Finishing
Weave in ends, wash and block to dimensions.

The original pattern can be found at http://www.knitpicks.com/patterns/Snowbobbles_Dishcloth__D55800220.html

Thursday, December 22, 2016

'Twas the night before Christmas

'Twas the night before Christmas
and all through the town
Not a sign of Baby Jesus
was anywhere to be found.

The people were all busy
with Christmas time chores
Like decorating, and baking,
and shopping in stores.

No one sang
"Away in a manger, no crib for a bed."
Instead, they sang of Santa
dressed-up in bright red.

Mama watched Martha Stewart,
Papa drank (root)beer from a tap.
As hour upon hour
the presents they'd wrap

When what from the T.V.
did they suddenly hear?
'Cept an ad.. which told
of a big sale at Sears.

So away to the mall
they all flew like a flash...
Buying things on credit..
and others with cash!

And, as they made their way home
From their trip to the mall,
Did they think about Jesus?
Oh, no... not at all.

Their lives were so busy
with their Christmas time things
No time to remember
Christ Jesus, the King.

There were presents to wrap
and cookies to bake.
How could they stop and remember
who died for their sake?

To pray to the Savior...
they had no time to stop.
Because they needed more time
to "Shop til they dropped!"

On Wal-mart! On K-mart!
On Target! On Penney's!
On Hallmark! On Zales!
A quick lunch at Denny's

From the big stores downtown
to the stores at the mall
They would dash away, dash away,
and visit them all!

And up on the roof,
there arose such a clatter
As grandpa hung icicle lights
up on his brand new step ladder.

He hung lights that would flash.
He hung lights that would twirl.
they never once prayed to Jesus...
Light of the World.

Christ's eyes... how they twinkle!
Christ's Spirit... how merry!
Christ's love... how enormous!
All our burdens... He'll carry!

So instead of being busy,
overworked, and uptight
Let's put Christ back in CHRISTmas
and enjoy some good nights!

Merry Christmas,
To all my friends and family!


Monday, December 19, 2016

Free Pattern of the Week

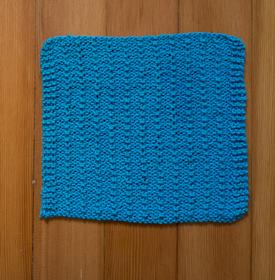
This week's free pattern is a Reversible Pips Washcloth from Knitpicks.comReversible Pips Dishcloth


Finished Measurements - 9” wide, 8” high
Needles - US 6 (4.00mm) 24” circular needle.
Notions - Yarn needle, Stitch Marker
Gauge - 17 sts x 27 rows = 4” on US 6 needles in pattern.


Notes:
The garter bumps on one side and knit ridges on the other make this a great reversible dishcloth with plenty of scrubbing power. This is also a great beginner pattern, all you need to know is how to knit and purl, cast on and bind off. With only two rows to memorize, you’ll have a whole pile of these dishcloths done, ready to tackle your dishes in a snap!

Directions

CO 41 sts.

Row 1 (RS): K3 sts, (P2, K1) repeat parenthesis across until the last 2 sts, K2.

Row 2 (WS): K across.

Repeat rows 1 & 2 until piece measures 8” or desired height, ending with a RS row.

Next row, BO.

Finishing-  Weave in all ends and block to measurements.

The Original pattern can be found at http://www.knitpicks.com/patterns/Reversible_Pips_Dishcloth__D55549220.html

Thursday, December 15, 2016

Hiking Boot Care

Hiking Boot Care

Being an Outdoor Guide means that everyone asks you how to fix their stuff. Here are some tips and tricks that you can use!

Here are 4 good habits to adopt:
  • Clean boots after every hike. A brush and some water are the basic tools.
  • Remove insoles/inserts after a hike to permit the whole boot to dry.
  • Do not expose boots to excessive heat; store them at room temperature.
  • When water stops beading on boot uppers, add a waterproofing treatment to restore their water resistance.
Read on for details on how to ensure that your boots enjoy a long life and perform at their best.

When Hiking Boots Are New

  • Keep the care instructions provided. Always follow the boot maker's maintenance advice.
  • New hiking boots rarely require treatment out of the box. Reason: Nearly all boots are factory-treated with a durable water repellent (DWR) finish.
  • Break in new hiking boots before attempting an extended trip.
  • If a flex point of a leather boot is slow to break in, apply conditioner to that spot to make it more pliable.

After Any Hike: Clean Those Boots

Cleaning Tips

Be diligent in cleaning hiking boots. You say you're too tired after a hike to clean your boots? Then clean 'em the following day.
Why bother?
  • With every flexing motion, particles of dirt, grit or sand can creep deeper into a boot's leather or fabric upper and grind away like sandpaper.
  • Mud can suck moisture from leather as it dries, leaving leather less pliable and vulnerable to accelerated aging.
  • Removable sock liners (found in some boots) or insoles are potentially machine washable. Check manufacturer instructions before attempting this. Always remove liners or insoles and let them air out.
Tip: Never put hiking footwear in a washing machine.
Use a brush to gently remove dust and dirt. Choose a specialized tool or an old vegetable brush or toothbrush. For maximum thoroughness, remove laces prior to cleaning. Add running water and a specialized boot cleaner, saddle soap or, if no other options exist, a mild dishwashing soap.
  • Do not use bar soap or detergents; they typically contain surfactants that attract water; detergents may also include fabric brighteners that can leave residues.
  • Mold on the boots? Brush in a mixture of 80% water and 20% vinegar.
If needed, wash off the outsole, too. A tread cleaner can extract stones and other stubborn gunk that plug your traction-boosting lugs. If mud is really caked on, soak the outsoles (not the uppers) in a shallow pan of water for several hours. Then hose away the sludge.

Drying Tips

  • Allow boots to dry at a normal temperature. Rushing the process is unhealthy for boots, particularly leather boots.
  • Remove insoles and let them air-dry separately from the boots.
  • Do not place wet boots close to a heat source (fireplace, campfire, wood stove, radiator, heater, sunny windowsill, whatever). High heat:
    • Weakens the adhesives used in modern footwear.
    • Bakes the upper, which could turn the leather brittle or cause it to shrink and curl, which potentially could squeeze a boot's toe counter (a nylon reinforcement in toe), which would alter its fit.
  • Recommended speed-drying method: Place boots (insoles removed, tongue propped open) in the path of a fan in a normal, room-temperature environment.
  • No fan handy? Stuff a sheet or 2 of newspaper into each boot. Newsprint is a surprisingly decent moisture absorber. Change the paper each hour.
  • Boots dry faster when positioned upside-down.
  • Store boots in a place where temperatures are stable and normal. Do not store boots in attics, garages, car trunks or any unventilated spaces where heat can rapidly accumulate.

After Extended Use: Clean, Condition, Waterproof

Cleaner
Use a cleaner when preparing to apply waterproofing, or any time stubborn residue (dust, mud, grime) is visible on the upper.
Use a cleaner periodically. You always want to clean boots after a hike, but a simple brush-off or a rinse-and-wipe is usually sufficient. But if boots are muddy or really dusty, adding a footwear-specific cleaner will optimize your effort.
Tip: Always clean boots thoroughly before applying waterproofing.

Conditioner

Use a conditioner when full-grain leather boots appear dry or cracked. It can also be used if new footwear needs to be broken in quickly.
Use a conditioner judiciously. Healthy leather (like our own skin) functions best when moisturized. Yet too much conditioner can make boots too soft, reducing the support they provide on rugged terrain.
Do not use Mink Oil or similar oils better suited for logging/industrial boots; it over-softens dry-tanned leather used in hiking footwear.

Waterproofing

Use a waterproofing treatment when water does not speedily bead up and roll off a boot's surface, allowing water to sink into the exterior layer.

Use it as needed. The frequency depends on how hard you use your boots. It is not uncommon for serious trail hounds who do a lot of wet-weather hiking to apply waterproofing several times a year.

Article and others like it found at REI.com
Monday, December 12, 2016

Free Pattern of the Week!


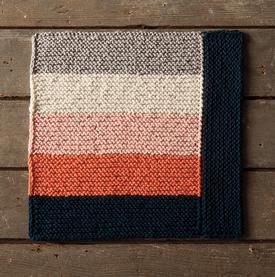
This week's free pattern is the Quadrant Dishcloth from Knitpicks.com.
Quadrant Dishcloth


FINISHED MEASUREMENTS - Approx. 10” square
NEEDLES - US 5 (3.75mm) needles or size needed to obtain gauge
NOTIONS - Yarn Needle
GAUGE - 5.5 sts = 1” in garter stitch

Notes:
Each stripe for CC1-CC4 will take approx. 7 grams of yarn, CC5 will take approx. 15 grams of yarn.

DIRECTIONS

CO 44 stitches with CC1.

Row 1: Wyif, slip first stitch P-wise, YO, K to end of row.

Row 2: Wyif, slip first stitch P-wise, YO, K to the last two stitches and k2tog.

Repeat Row 2 sixteen more times, for a total of 18 rows or until stripe measure 2” long.

With CC2, repeat Row 2 a total of 18 times or until stripe measures 2” long.

With CC3, repeat Row 2 a total of 18 times or until stripe measures 2” long.

With CC4, repeat Row 2 a total of 18 times or until stripe measures 2” long.

For the final stripe (which will become the asymmetrical border), repeat Row 2 a total of 18 times of until stripe measures 2” long.

Row 19: Wyif, slip first stitch P-wise (do not YO) and BO across the row, leaving the last bound off stitch on your needle.

Turn piece clockwise in order to PU stitches along the lengthwise edge of the dishcloth. You will be picking up stitches by going into each selvage edge stitch (there will be one edge stitch for every two rows of garter stitch).

PU 10 stitches along the edge of CC5 stripe and 9 sts along the edge of CC4 , CC3, CC2 and CC1 stripes.

You will now have a total of 48 stitches picked up.

Row 1: Wyif, slip first stitch P-wise, YO, K to end of row.

Row 2: Wyif, slip first stitch P-wise, YO, K to the last two stitches and k2tog.

Repeat Row 2 sixteen more times, for a total of 18 rows.

BO across entire row.


Finishing
Weave in ends, wash and block to size.

The original pattern can be located at http://www.knitpicks.com/patterns/Quadrant_Dishcloth__D55548220.html

Thursday, December 8, 2016

Winter solstice

Winter solstice, falling this year on Monday, Dec. 21, marks the first day of winter in the Northern Hemisphere. More precisely, winter officially begins at 10:48 p.m. ET — the moment when the Northern Hemisphere is pointed at its furthest distance from the sun. This means winter solstice boasts the longest night & the shortest day, & often colder temperatures, too.
Good news? If you’re not a fan of winter, from each day on after the solstice, the days will get longer & warmer until the calendar hits summer solstice, June 20, 2016. Summer solstice marks the first day of summer, the longest day of the year in the Northern Hemisphere.

Monday, December 5, 2016

Free Pattern of the Week!

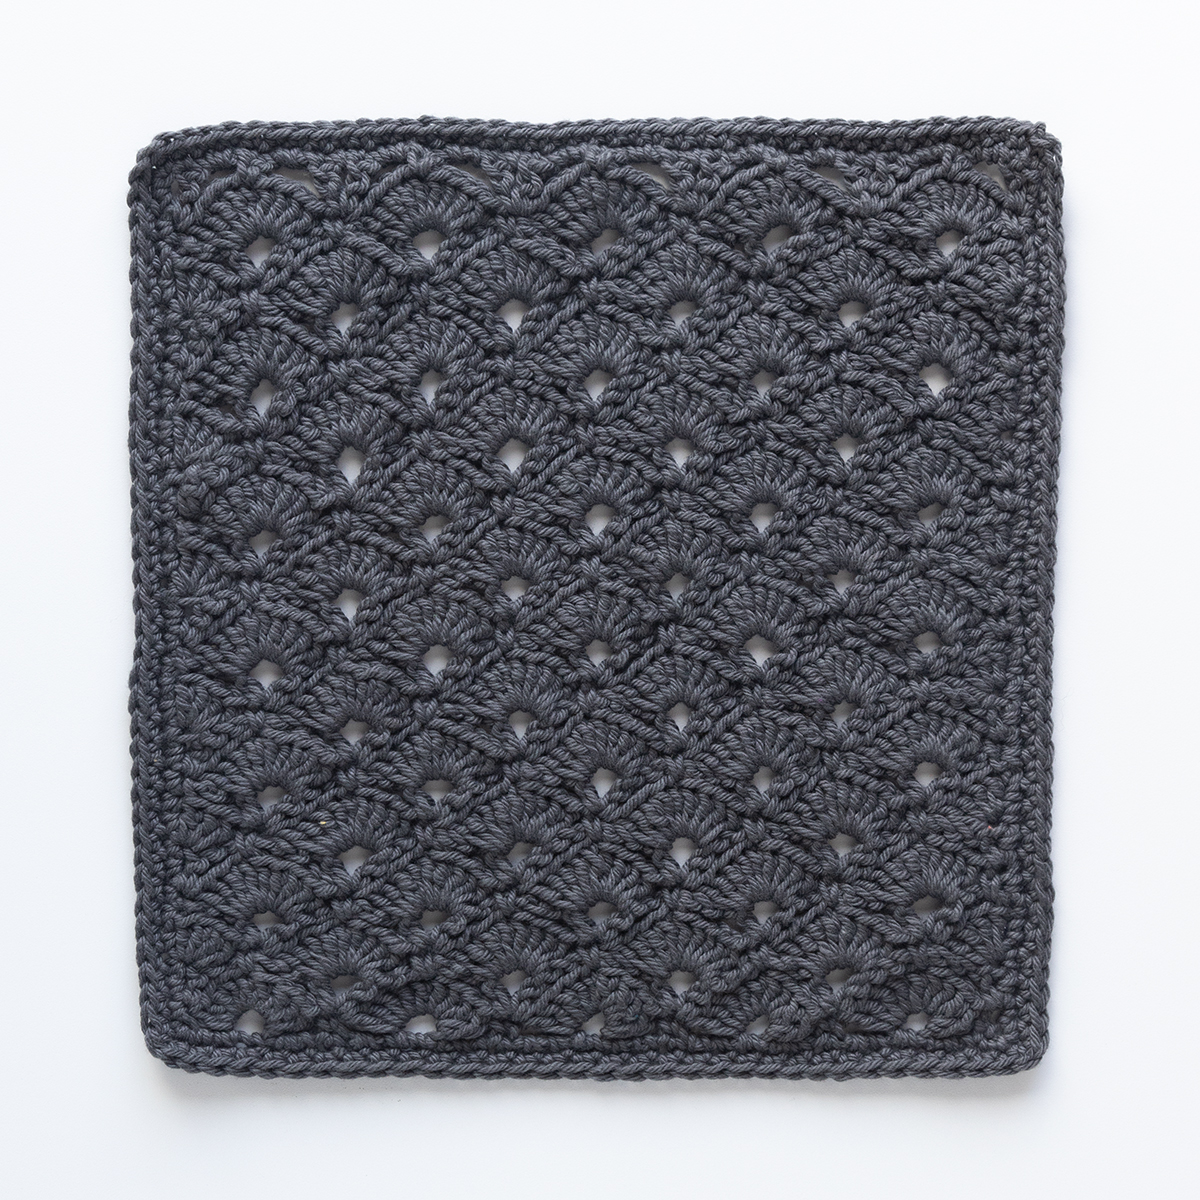
This weeks free pattern is the Jazz Age Washcloth from KnitPicks.com.

Jazz Age Crochet Washcloth

Finished Measurements - 10” long x 10” height, unblocked
Needles  - US Size G crochet hook (4.00 mm)
Notions - Yarn Needle, Blocking mat(s), Blocking pins
Gauge - 2 shells = 4 inches in pattern stitch  (gauge is approximate)


Jazz Age Washcloth
Notes
Even flappers and philosophers have to do the wash, right? With a 4-row repeat of alternating fan and v-stitches, this little washcloth is complicated-looking but surprisingly easy to memorize. And it’s not just for dishes; crocheted in spa-quality cotton-linen blend, it’s also lovely as a facecloth (and all that
jazz).

Special Stitches
V-st: Fan and V Sitch - [1 dc, chain 1, 1 dc] in one stitch

Directions

Body - Chain 42

Row 1: 1 sc in 2nd chain from hook, *skip 3 chain, 9dc into next chain, skip 3 chain, 1 sc into next chain; rep from * until end, turn.

Row 2: Chain 3, 1 dc into first st, *chain 5, skip 9 dc group, work v-stitch [1 dc, chain 1, 1 dc] into next sc; rep from *, ending with chain 5, skip last 9 dc group, 2 dc into last sc, turn.

Row 3: Chain 3, 4 dc into first st, *(working over next chain 5 space so as to enclose it) 1 sc into 5th dc of 9 dc group in row below, 9 dc into center space of v-stitch; rep from *, ending with 1 sc into 5th dc from 9 dc group in row below, 5 dc into top of turning chain, turn.

Row 4: Chain 3, skip 5 dc group, v-stitch into next sc, *chain 5, skip 9 dc group, v-stich into next sc; rep from *, ending with v-stitch into last sc, chain 2, Sl st into top of turning chain, turn.

Row 5: Chain 1, 1 sc over Sl st into 1st stitch of row below, *9 dc into center space of next v-stitch, (working over next chain 5 so as to enclose it) 1 sc into 5th dc from 9 dc group in row below; rep from *, ending with 1 sc into 5th dc from 9 dc group, 1 sc into first chain of turning chain, turn.

Row 6 – 25: Repeat Rows 2-5 five times.

Row 26: Chain 3, 1 dc into first st, *chain 3, 1 sc into 5th dc of 9 dc group, chain 3, v-stitch into next sc; rep from * until end.


Border

Row 1: Chain 1, turn to work 1 sc in each space along the outer
perimeter of the dishcloth, with 2 sc in each corner space;
complete round with Sl st into starting sc.

Row 2: Chain 1, work 1 sc into each stitch; complete round with Sl
st into starting sc, cut yarn and fasten off.

Finishing

Weave in ends. If giving as a gift, this stitch pattern looks extralovely
when blocked.


The origional pattern can be found at http://www.knitpicks.com/patterns/Jazz_Age_Crochet_Washcloth__D55547220.html

Thursday, December 1, 2016

Sleeping Bag Care Between Trips

Sleeping Bag Care Between Trips

Being an Outdoor Guide means that everyone asks you how to fix their stuff. Here are some tips and tricks that you can use!


Spot Cleaning

Any time you wash a sleeping bag, you subject it to wear and tear and decrease the loft a little. Spot cleaning the shell with a paste of laundry detergent, water and a toothbrush is advised before washing the whole thing.
Focus on the hood and collar where hair and skin oils tend to accumulate. By holding the shell or liner fabric away from the insulation, you can wash and rinse the area without getting the inside wet.

Washing

If your bag is losing loft, is darkened with grime and basically no longer inhabitable, then by all means give it a full washing.
Tip: Dry cleaning is not appropriate for sleeping bags, especially down. Solvents used in dry cleaning can strip the natural oils from down that help it retain loft. Solvents are also very difficult to remove from synthetic insulation.
If you decide to wash your bag yourself, use a gentle, non-detergent soap that is made for washing down- and synthetic-filled items.
  • Down: For down bags, hand-washing in a bathtub works best. Fill the tub with warm water and add one of the above-recommended cleaners. Put the bag in and gently work in the soap, then allow it to soak for 15 minutes. Drain the tub and press out any remaining water. In a cold-water rinse, work the soap out gently, let the bag sit for 15 minutes and drain. Press out any remaining water. Repeat the rinse until all the soap is out. It's also possible, (according to some bag manufacturers) to machine wash a down bag, as long as a front-loading washer is used. Never use an agitator-style machine as the motion can damage the stitching and insulation. Make sure to wash on the gentle cycle in cool water with one of the aforementioned down soaps.
  • Synthetics: Synthetic bags can be washed in the same way. Hand-wash in a bathtub, or use a large, front-loading washer with no agitator. Use cool water and mild soap. Rinse several times to make sure all the soap is removed. An extra spin cycle or an extractor may be used to remove excess water.

Drying

Air drying is the safest way to dry your bag, but obviously the longest. If you tumble dry your bag, use very low heat or a no-heat setting and keep an eye on it. Dryers have varying heat outputs, so you need to check periodically to make sure the shell and insulation aren't overheating, which can actually lead to melting. Add a couple of clean tennis balls when the bag is nearly dry. This will help break up any clumps of insulation and help restore the loft.

Storage

How you store your bag affects its lifespan. When you arrive home from a trip, first air out the bag inside-out to make sure it's dry. Then store loosely in a large cotton storage sack—often included when you purchase a sleeping bag, but also available separately.
Do not store your bag compressed in its stuff sack as this will eventually damage the fill. Watertight storage bags are also a bad idea. Condensation can build up inside and result in mildew.


Other Sleeping Bag Tips

Restoring DWR

The original DWR (durable water repellent) finish on a sleeping bag's shell eventually wears off. You can restore water repellency and help keep the bag cleaner if you reapply this finish. There are several products available to restore the DWR to your sleeping bag shell fabric.

Leaking Down

Many, but not all, goose-down bags feature "down-proof" liners and shells made of very tightly woven fabric which prevent the down from escaping. If a few feathers make it through the shell or liner of your bag, don't become too concerned. This is normal, especially along the seams. The sharp quills of the feathers may poke through, especially when the bag is new and the down hasn't totally settled. Work the feathers gently back inside, pulling from the opposite side; the holes should be minimal and close back up.

Fabric Tears


For small holes or tears in the sleeping bag shell, a patch of nylon repair tape will do the trick until you get home.
Article and others like it found at REI.com